Building a Lantern for the Carnival of the Baubles
It all started when Mash got offered a place on a course for building lanterns for this year’s parade. She took one of her crafty friends down for the day, at which point she found out it was a build day for local artists, planned too big, and knew I wouldn’t be able to not join in with the build. Bon appétit.
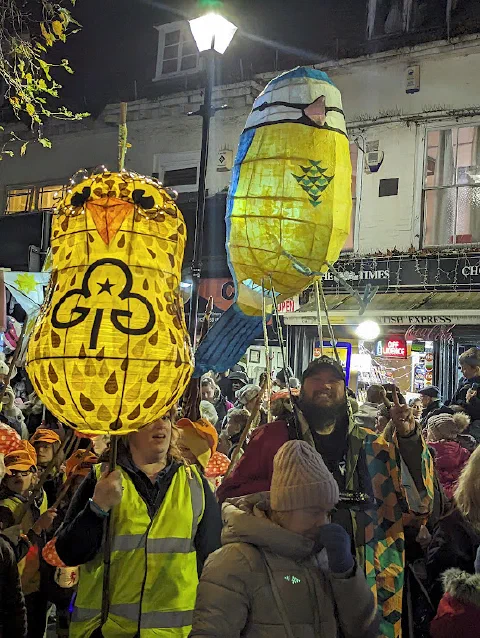
Lanterns at the Carnival of the Baubles in 2023.
The Carnival of the Baubles
Ashford’s Carnival of the Baubles is the parade that kicks off Christmas in the town centre. This year it was on Saturday 21 November, with a whole day of markets, crafts and performances around town, then the parade setting off from Lower High Street at 5pm for a finale at Elwick Place, outside the cinema, at 6pm. It was led by a disco turtle with a DJ on top1. The map and info flyer (originally from Love Ashford) has the route and the day’s other events.
This year’s theme was “The Day of the Dance”. Which it turns out is quite a hard theme to match, but with some liberal stretching of the theme with music lots of lanterns got built.
Made in Ashford
Made in Ashford is a collaborative shop in County Square, run by the social enterprise Craftship Enterprise CIC, that supports local artists and makers. They lead the lantern making with Emergency Exit Arts, running workshops in the weeks before the parade and selling £5 kits for building one at home2. The shop is also one of the stops on the Lantern Window Trail around town in the run-up to the parade.
How the Lanterns Are Built
The lanterns are willow, bamboo and tissue paper, and are mostly held together with masking tape3 and the skin held tight with glue. Mash went to the lessons on how to build one, so by the time I joined in the frame was already well under way.
The core is bamboo for strength and all the details are taped and twisted willow. Willow is used because it’s flexible and strong, and makes good curves4.
The white skin is wet strength tissue paper, stuck on with watered-down PVA glue. The colours come from coloured tissue paper collaged on top of the white skin.
On the night, the finished lanterns are rigged on a pole with a light, collected from the muster point on East Hill, and carried in the procession. At the end, a team in hi-vis de-rigs them, and you get to take your lantern home.
Our Lantern - A Dance Mat
The design was Mash’s choice, she wanted something “easy”5, and something she knew I would want to help with building.

The inspiration: a Dance Dance Revolution arcade stage. Photo by Poiuyt Man, CC BY-SA 3.0, via Wikimedia Commons.
There are a few rules for the build, including sensible things like no logos or copyrighted content, so we took the form, but not the design from existing mats.
Day 0 - The Day Before I Joined In
What happened this day is based on what I’ve been told, but this was the learning, designing day, and the start of the build.
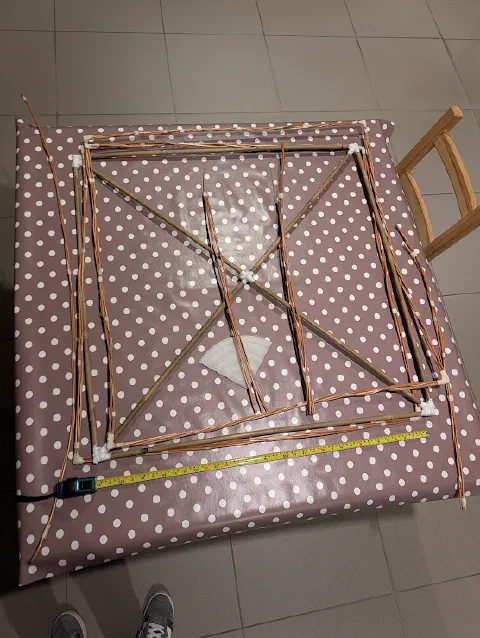
The frame at the end of day 0 and how I found it when I joined the build.
Day 1 - I Join In
This was my first day on the build, and we got quite a bit done, we went from two rough faces and the bones, to a full 3D lantern shape.
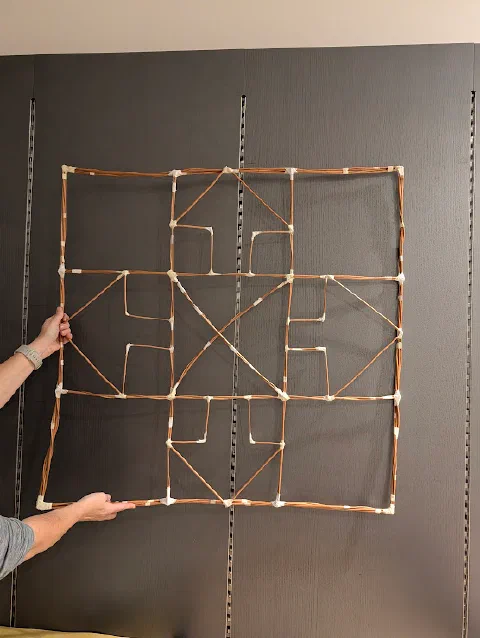
One face of the cuboid, part way through.
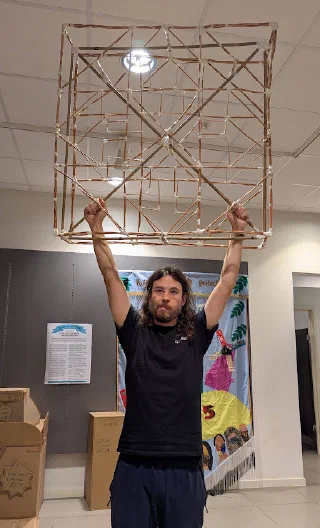
The end of my first day (the second day of the build), with the frame mostly done.
Day 2 - Poles and Skin
Day two included a little bit of surgery on the bamboo core to square it up with the willow6. We added some short poles (to be extended on the day) to allow us to carry the lantern. And started adding the paper skin. We could only cover so much because we had to wait for the first bits to dry, and to allow us access to add the lights later.
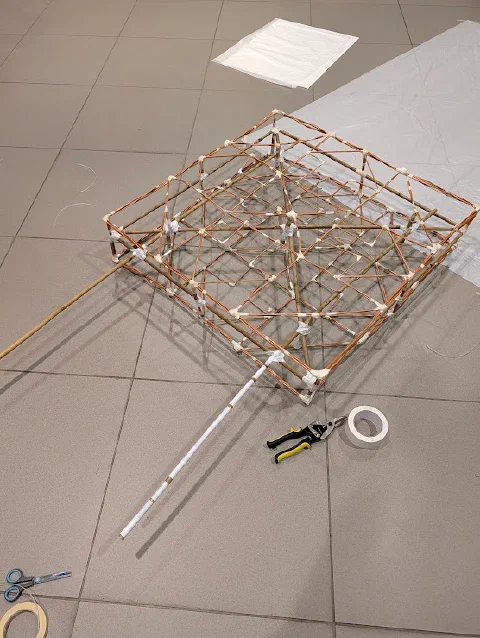
My second day: adding stubs for the poles to carry it.
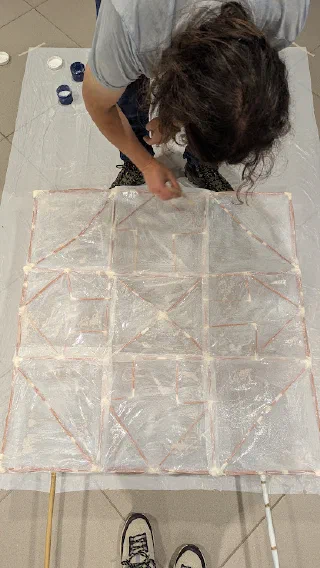
Adding the skin: wet strength tissue paper and watered-down PVA.
Day 3 - Avoiding the Problem
The next day the plan was to do more work on it, but instead of waiting around for the glue to dry we decided to take it home. In hindsight, I should have measured the car first. It did just fit, after moving the front seats forward a bit to get the poles past.
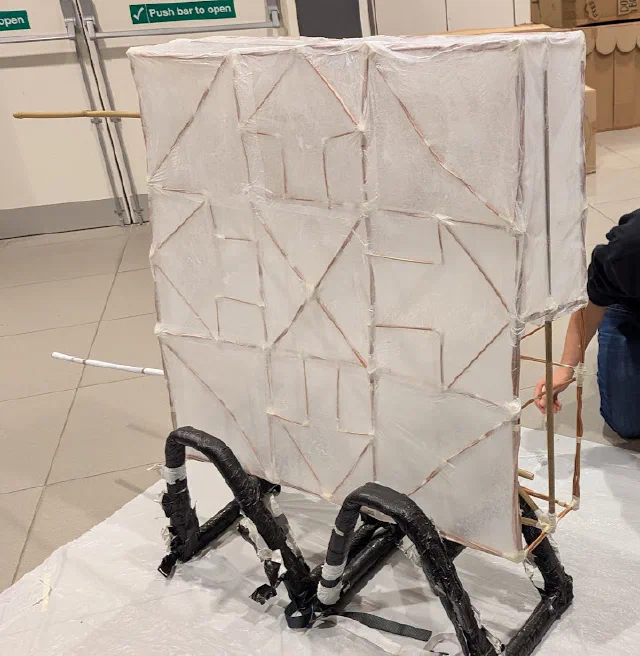
Skinned, and about to find out if it fits in the car.
Day 3+ - Work from Home
Before we could do much more on the main part of the lantern I needed to get the lights sorted, as we needed access to install them. Mash did take the time to start decorating the side of the lantern we had already skinned though.
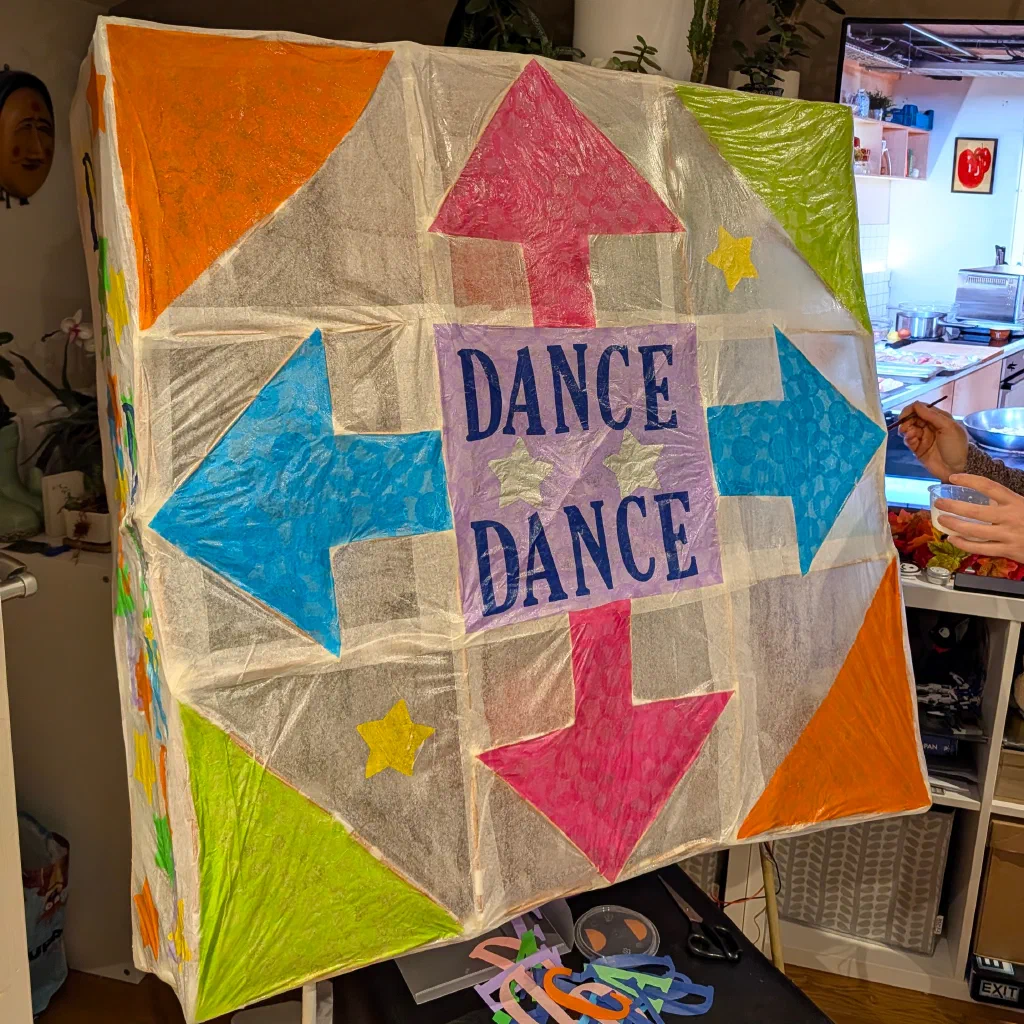
The front, decorated by Mash.
The Lights
For the up, down, left and right arrows I designed a “neon” form in FreeCAD7 and 3D printed it on my trusty A1 Mini8, a disc with a spiral channel for a length of my favourite LED tape (12V, 120 LEDs per metre) to sit in. Each disc can draw about 1.5A, which is a bit hair-raising in something made of tissue paper and willow.
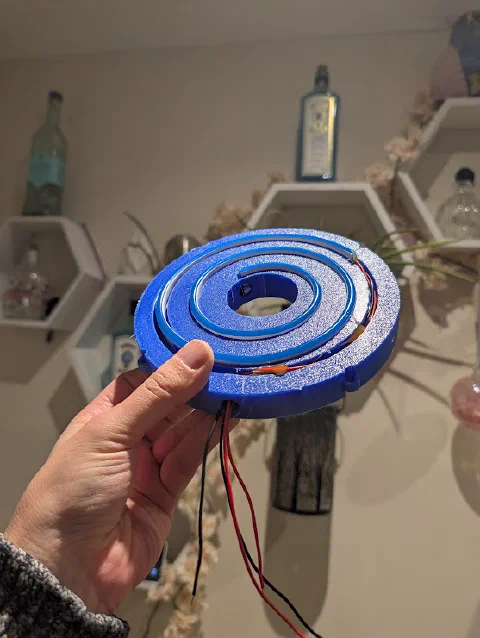
One of the “neon” discs for the arrows.
The light holder in 3D.
Most of the other bigger lanterns are lit with strings of LEDs running off three AAA batteries. Ours ran off a USB battery pack instead: a USB PD trigger board asks it for 12V to power the neon, and the twinkly lights run straight off its USB-A port.
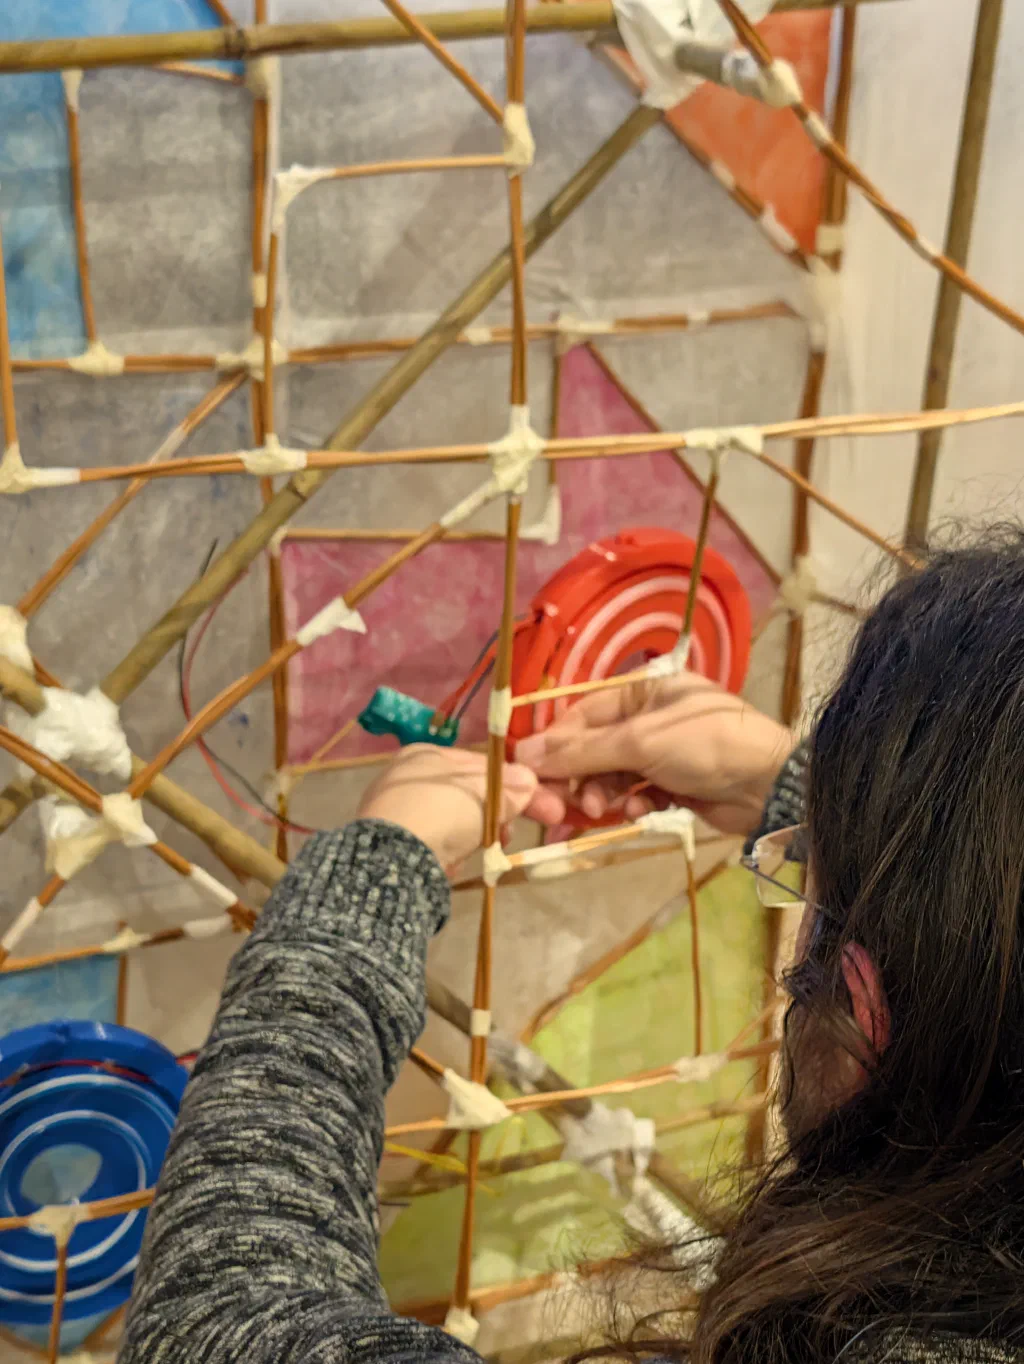
Me, wiring in the discs from inside the frame.
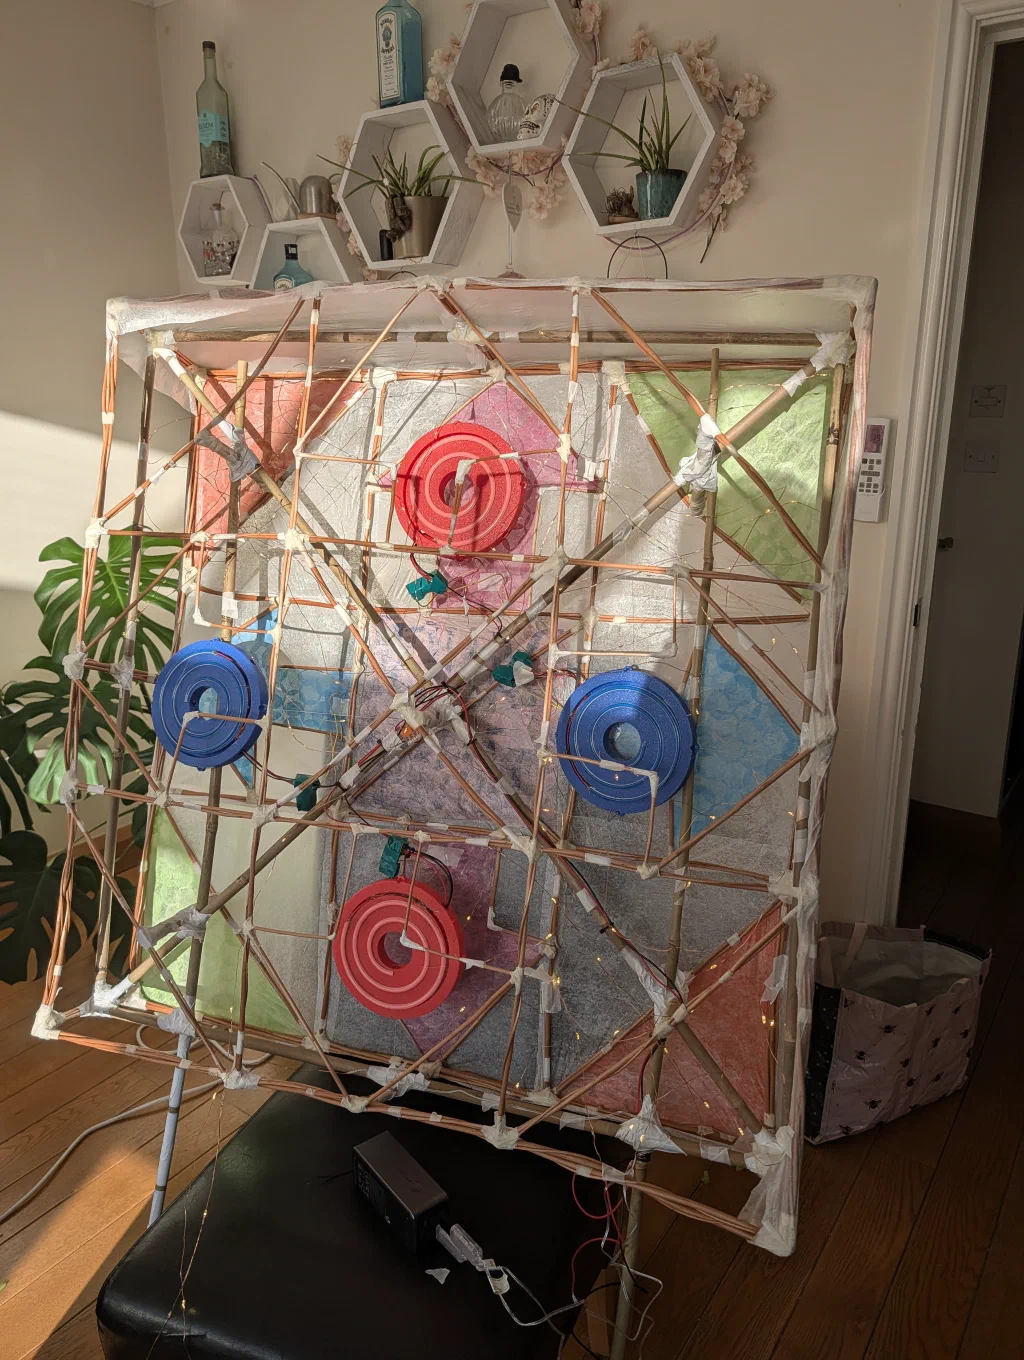
The lights fitted inside, before the last side was skinned.
The Gimmick
Of course I couldn’t help but overcomplicate things. The plan was for the arrows to light up when a pair of shoes on poles was “stepped” in front of them, like someone is actually playing on the mat. Each arrow has a reed switch behind it, and the soles of the shoes have magnets in them, so when a shoe gets close enough the switch closes and that arrow lights up.
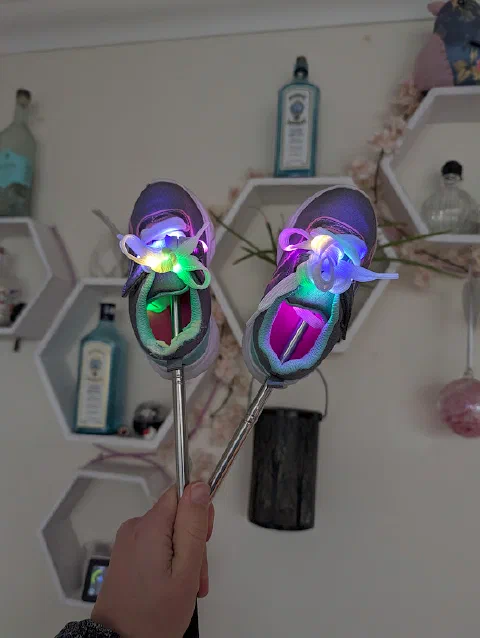
The shoes on poles, with light-up laces.
The first reed switches I bought, plastic ones, were a bust, as I couldn’t get solder to wet to the legs at all, so I ended up ordering some glass ones instead. These weren’t much better to solder, it took lots of flux and a very hot iron, and even then the solder didn’t really want to wet.
The wiring is pretty simple. The 12V from the PD trigger board goes to a MOSFET switch board for each disc, and each board’s trigger input is wired through a reed switch. When a magnet gets close the switch closes, the MOSFET turns on, and that disc lights up.
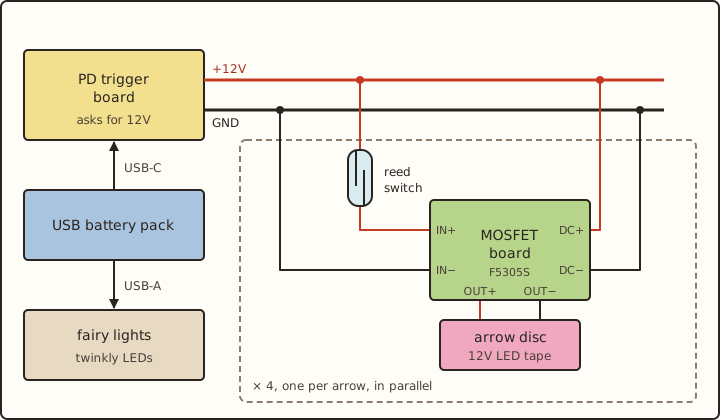
How the lights are wired. Each arrow gets its own reed switch and MOSFET board.
The reed switches came with some small round magnets, which turned out to be terrible at setting them off. A reed switch wants the magnetic field running along its length9, and the field from a small disc mostly comes straight out of its face. So I bought some longer, axially magnetised rod magnets and superglued them to the bottom of the shoes. After the first tests I was a bit worried about how well they would work, but when we were out and about walking it turned out they worked pretty well.
Squares Are Hard
The trouble with squares is that when things don’t line up, it’s obvious. A wonky bit on a curve just looks like part of the curve, but a straight edge that isn’t straight sticks out.
The bamboo core was our biggest problem. After the first assembly it was sticking out further than the willow in the corners, so on day two it had to be tweaked to pull it back in line with the rest of the frame.
The final shape still isn’t super square, but over the size of the whole lantern it’s not too obvious.
On the Night
A few photos and a video from the night. Walking whilst trying to line the shoes up with the reed switches was hard enough, so I couldn’t really take any photos as we went. Thanks to Guy and my mum for the ones of the lantern in the parade, and to Mash for the one of the lanterns resting afterwards.
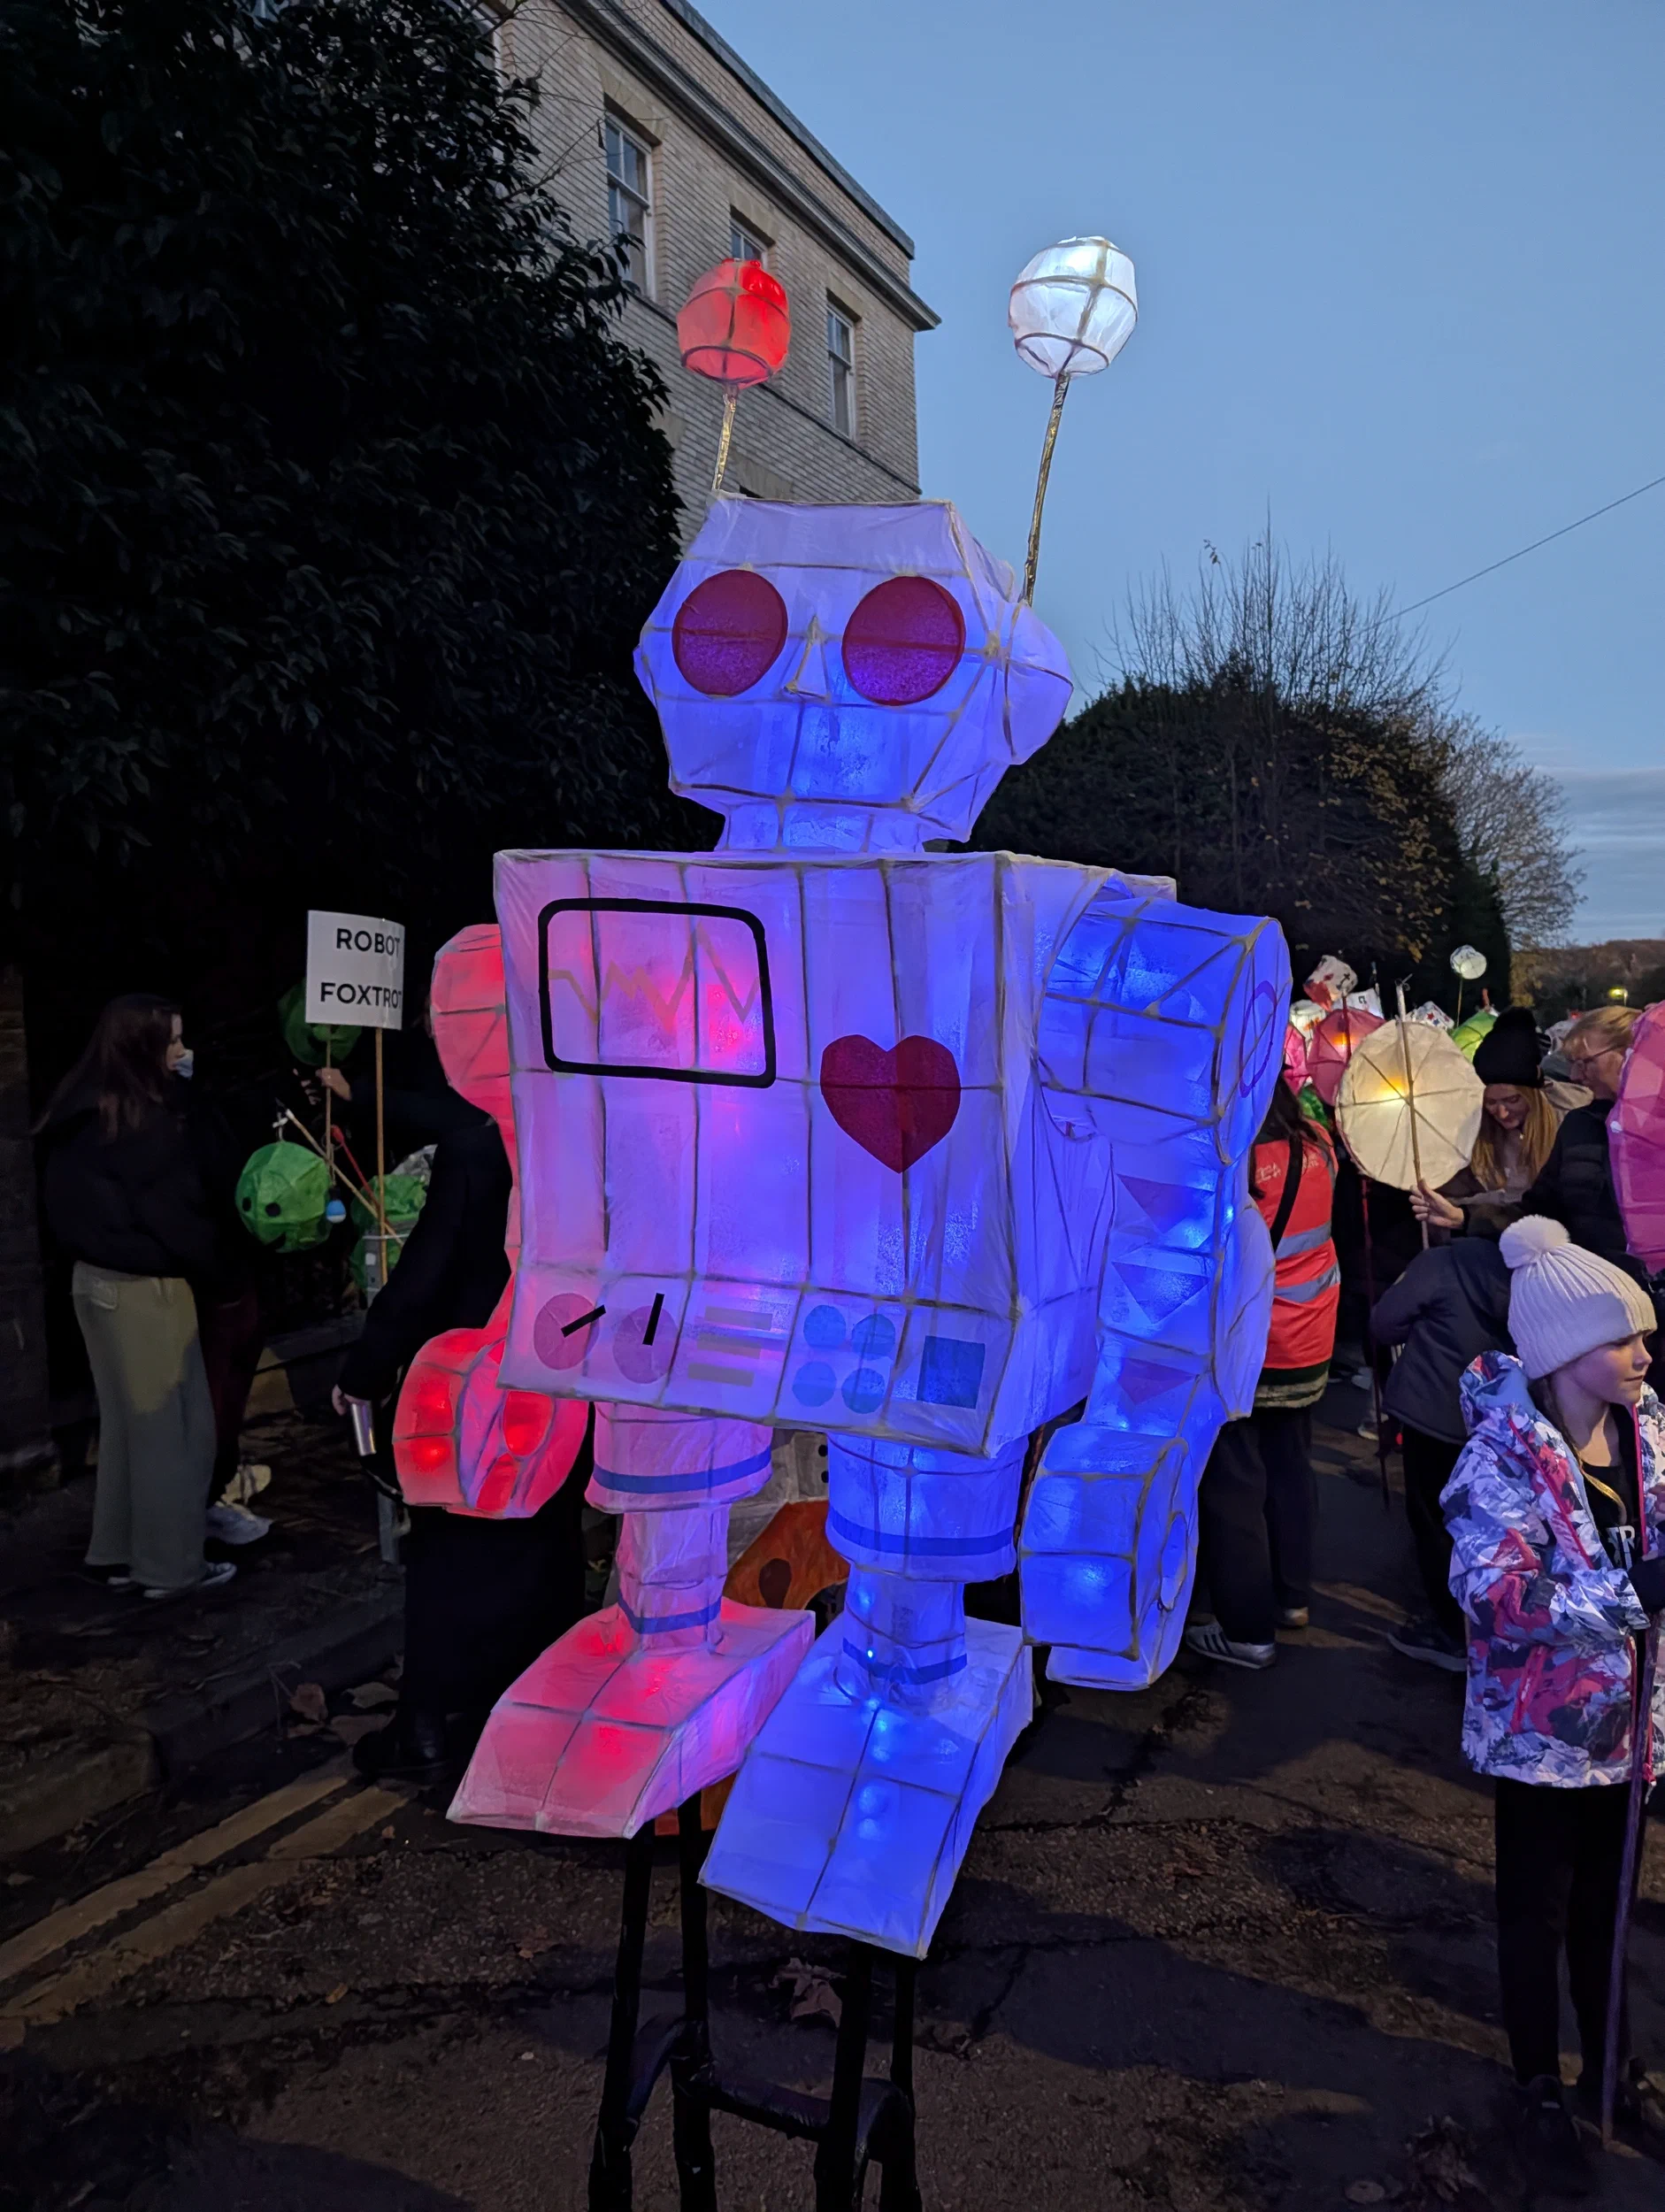
Robot Foxtrot
- Sat 21 Nov 2026, 16:28
- Google Pixel 10 Pro
- Main camera
- 7mm · f/1.7 · 1/576s · ISO 578
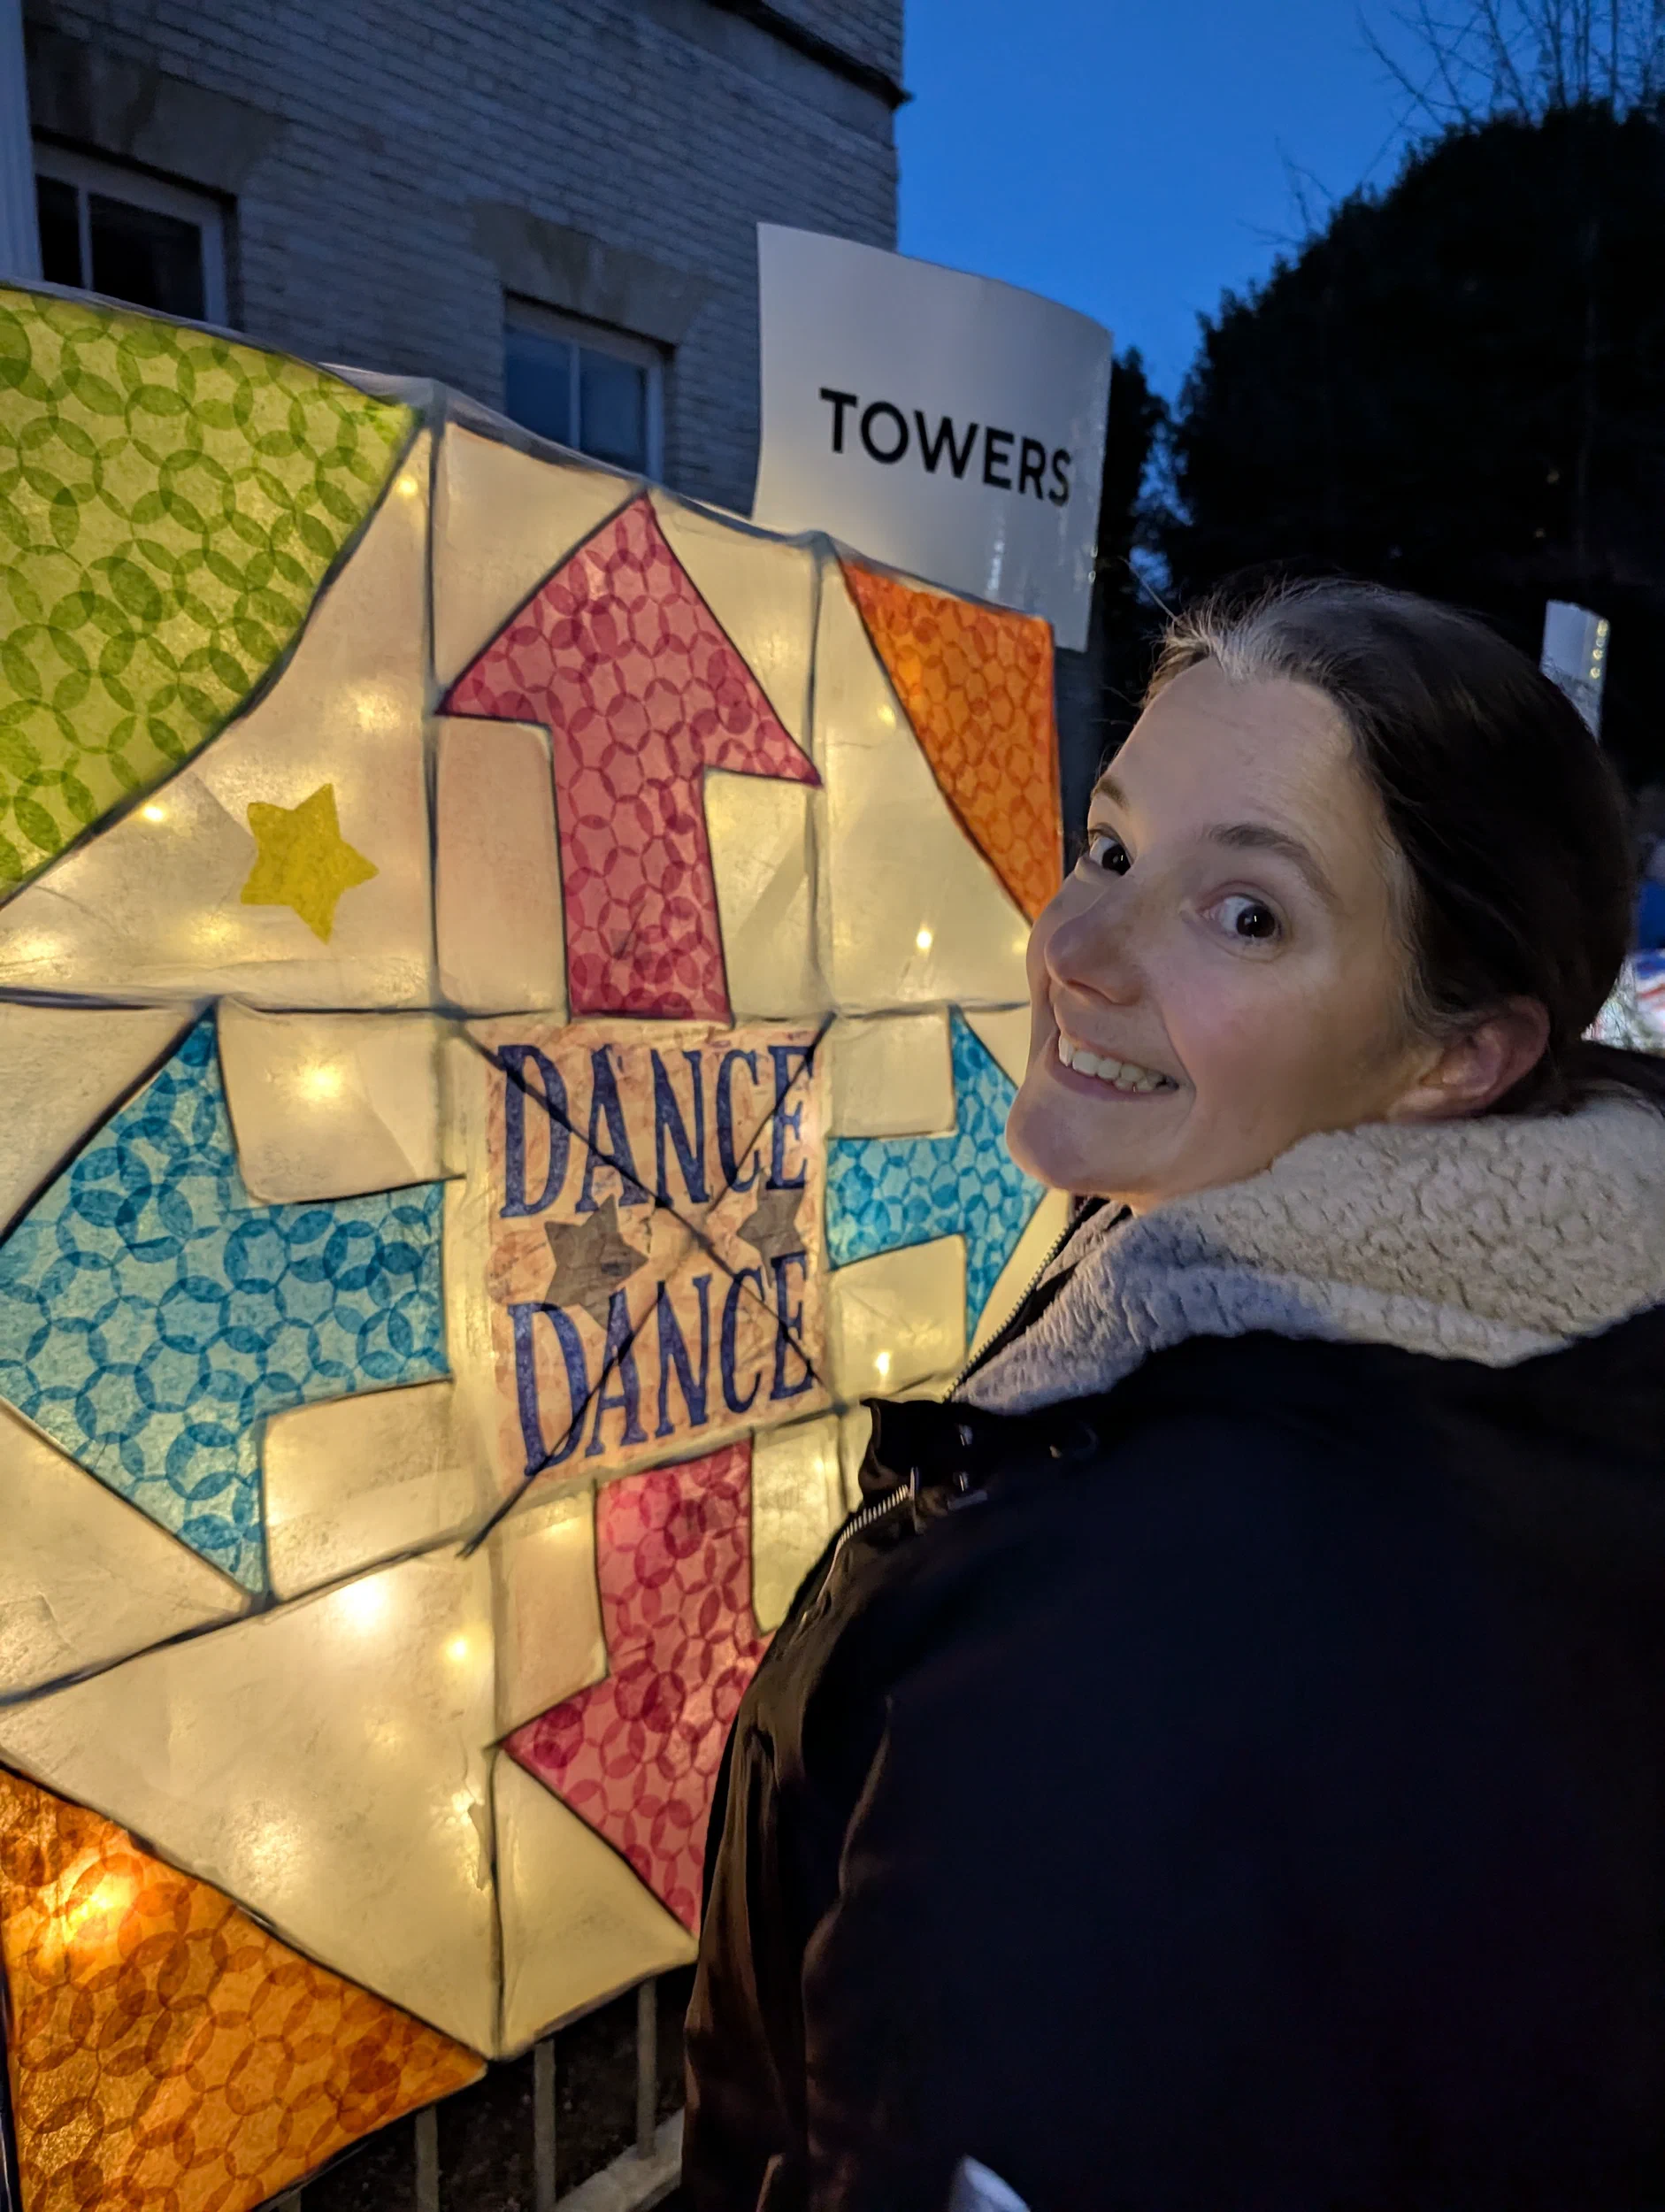
Mash and the Dance Mat
- Sat 21 Nov 2026, 16:35
- Google Pixel 10 Pro
- Main camera
- 7mm · f/1.7 · 1/50s · ISO 360
Drums Before the Parade
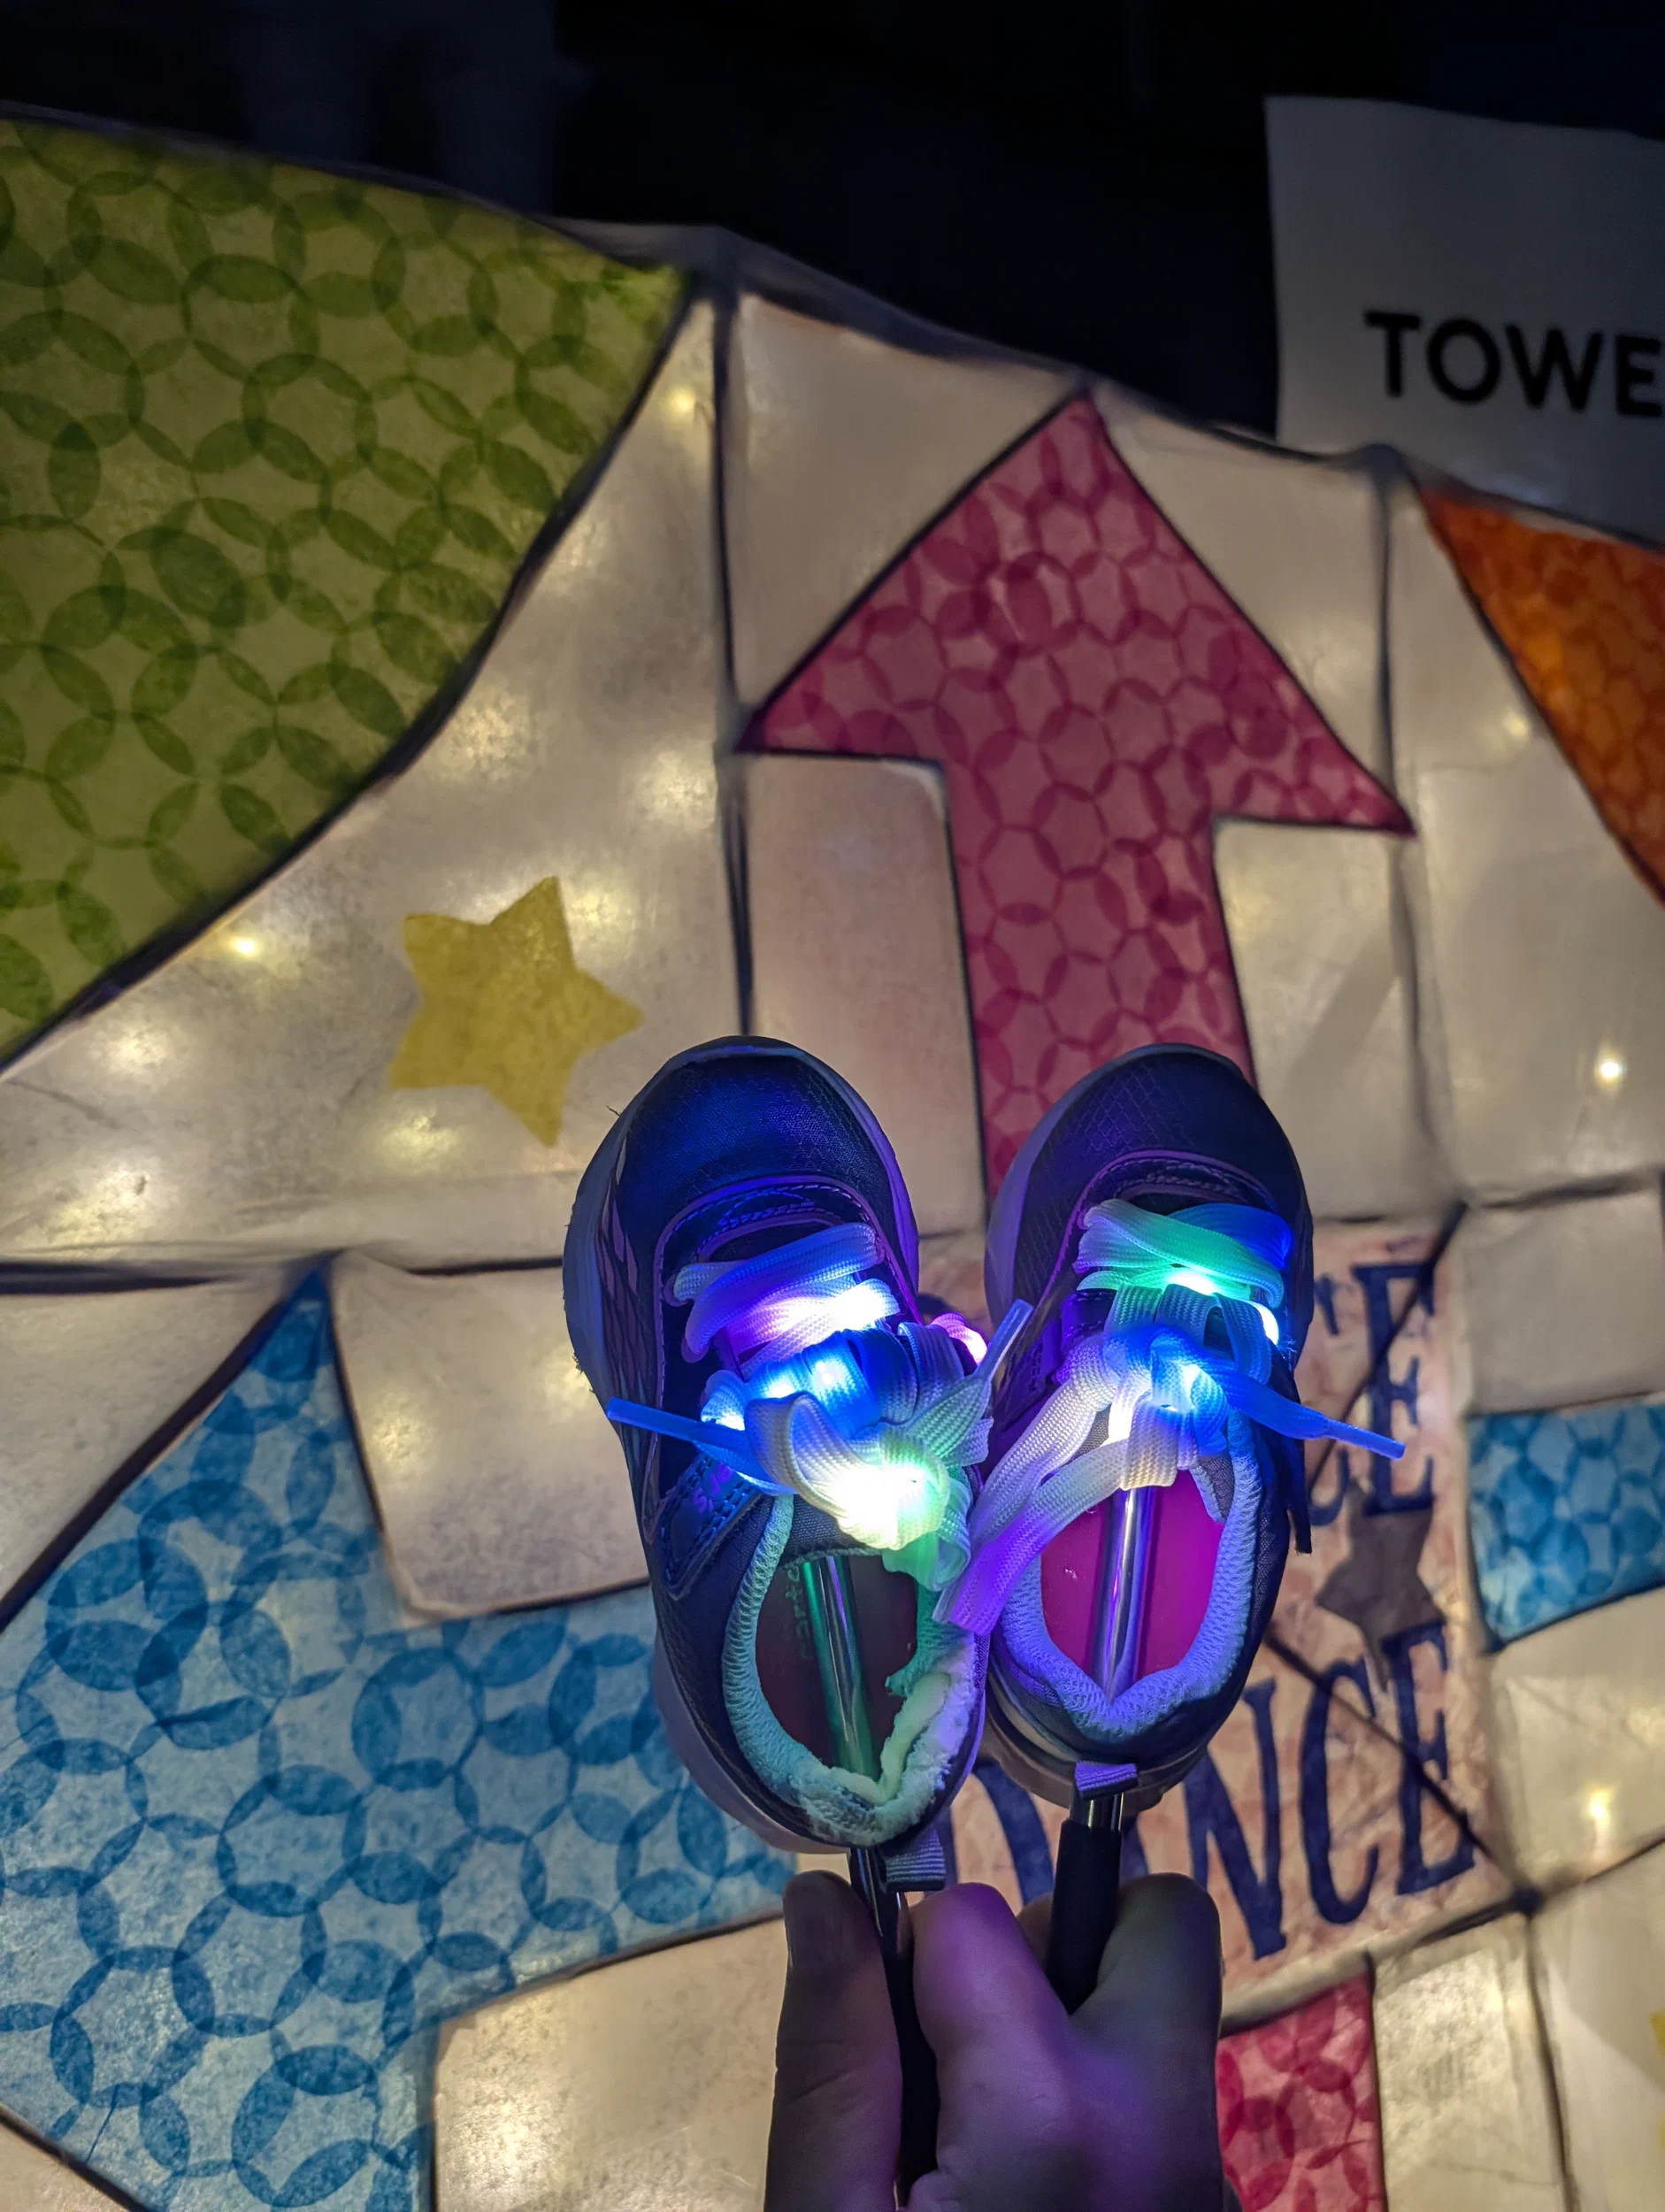
Shoes on the Mat
- Sat 21 Nov 2026, 16:50
- Google Pixel 10 Pro
- Main camera
- 7mm · f/1.7 · 1/190s · ISO 289
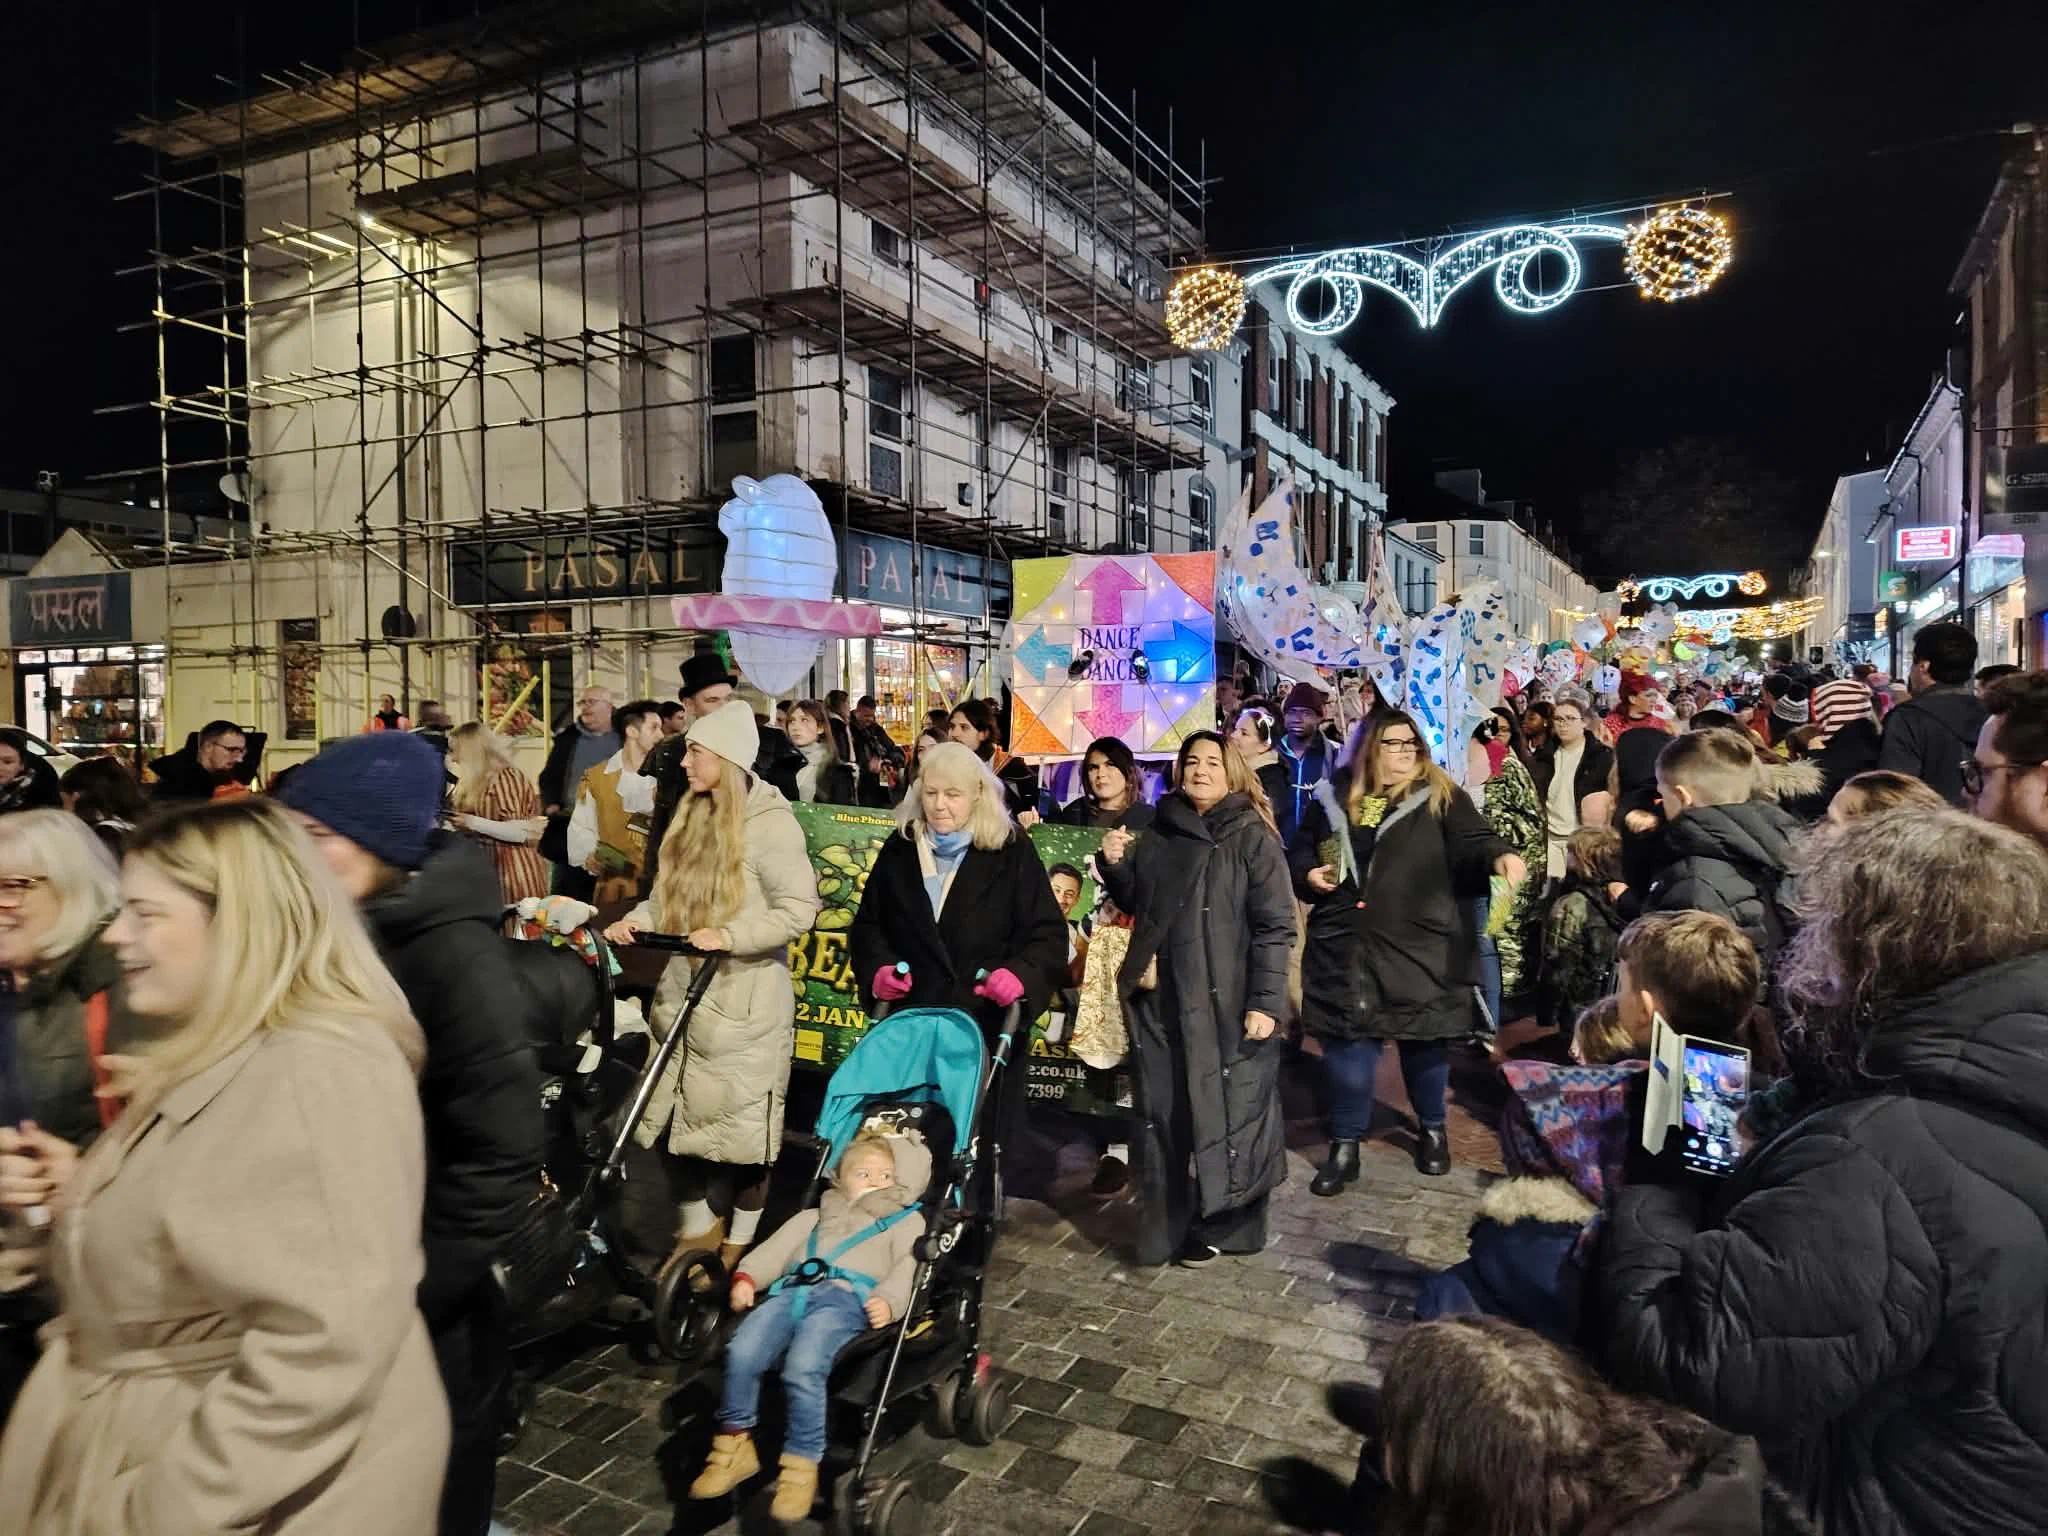
The Parade
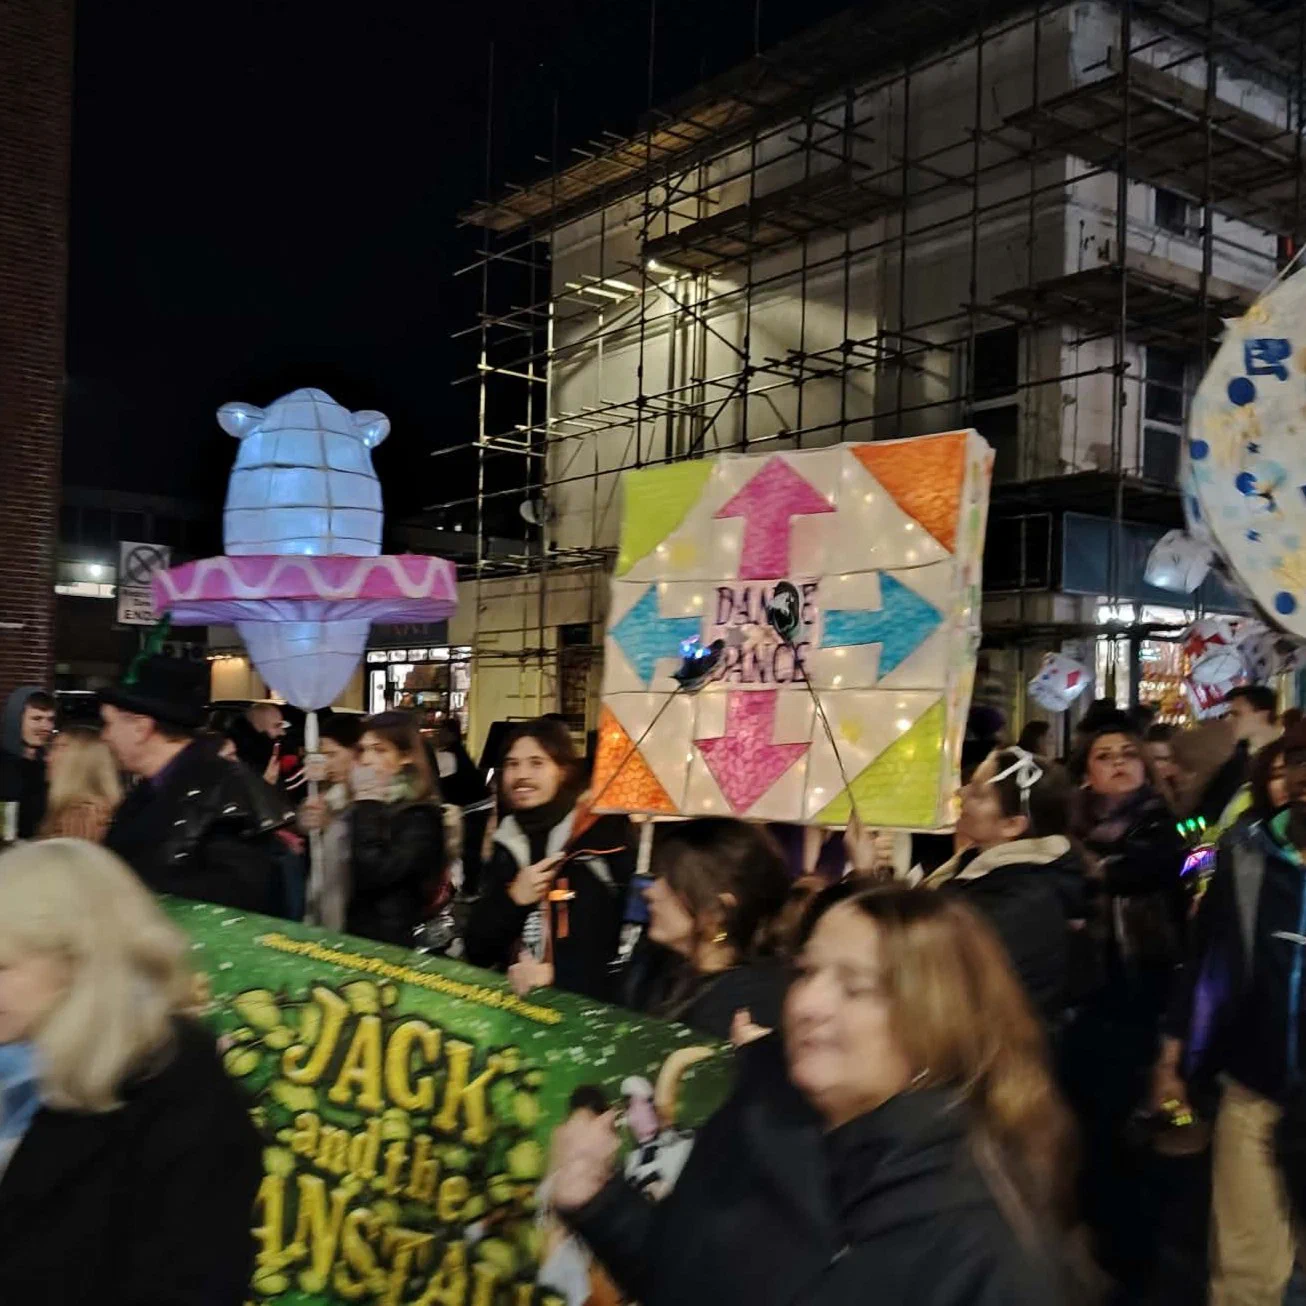
Dance Mat in the Parade
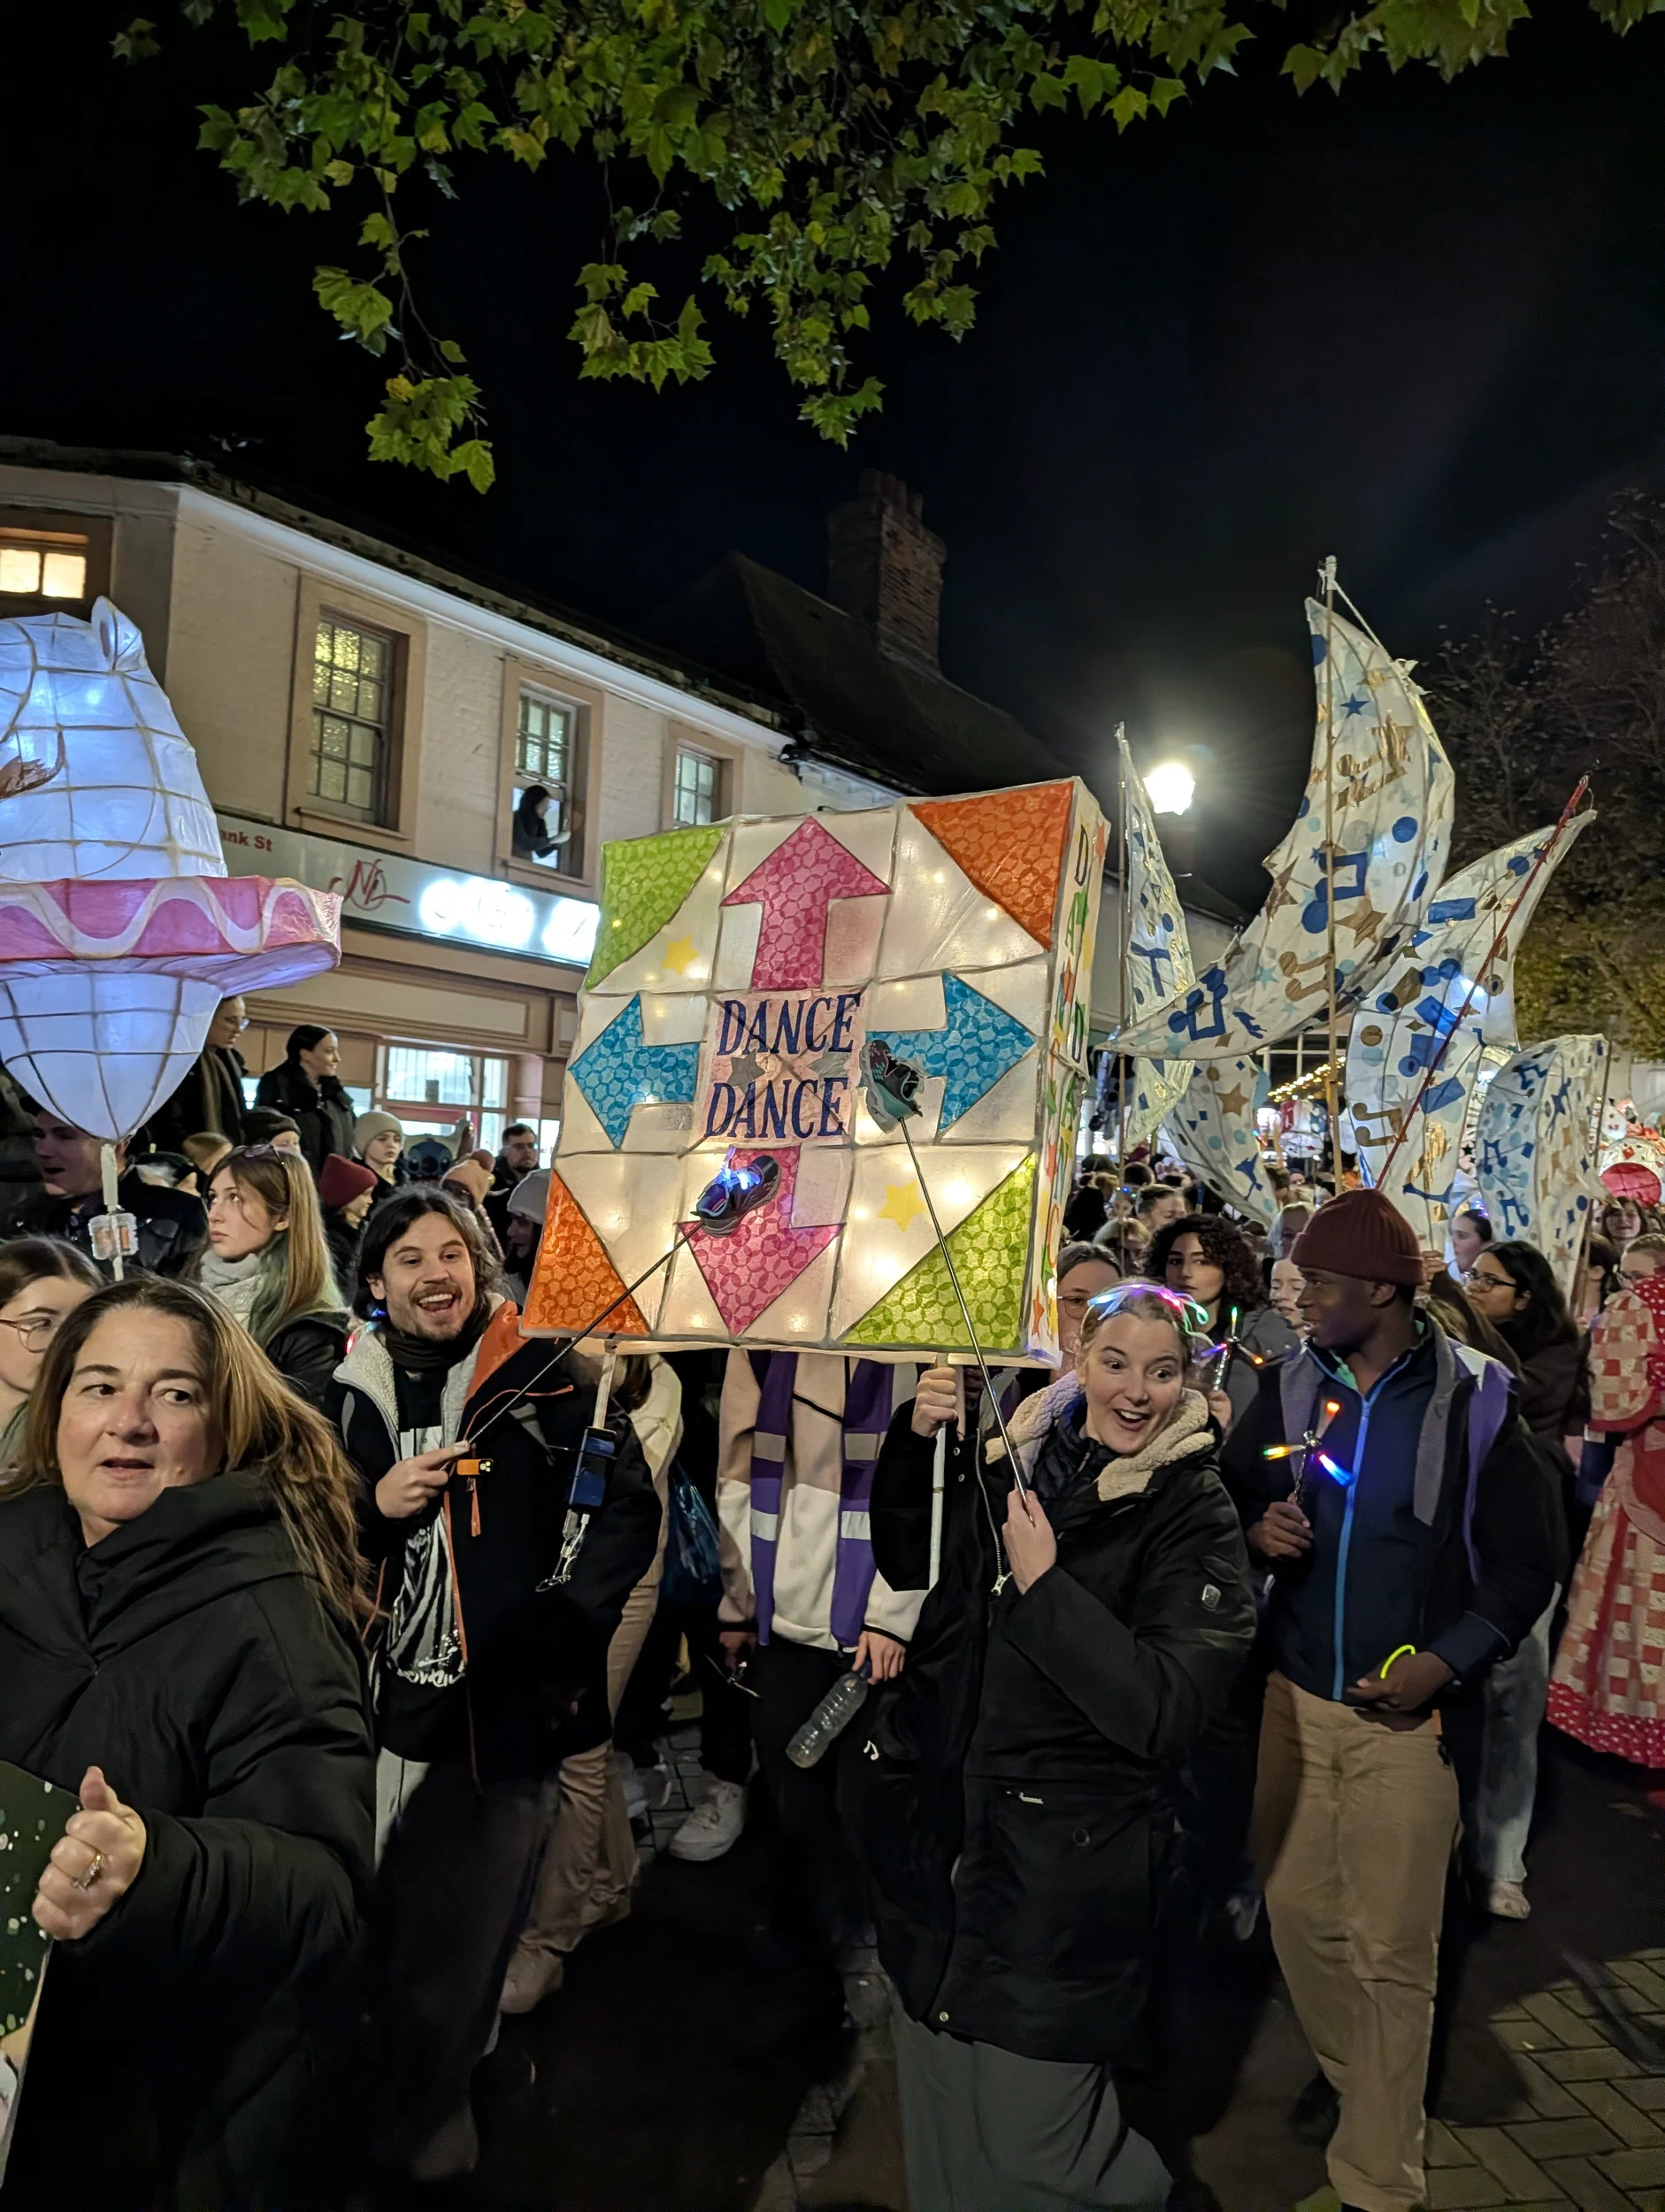
Lantern in the Crowd
- Sat 21 Nov 2026, 17:19
- Google Pixel 10 Pro
- Main camera
- 7mm · f/1.7 · 1/100s · ISO 797
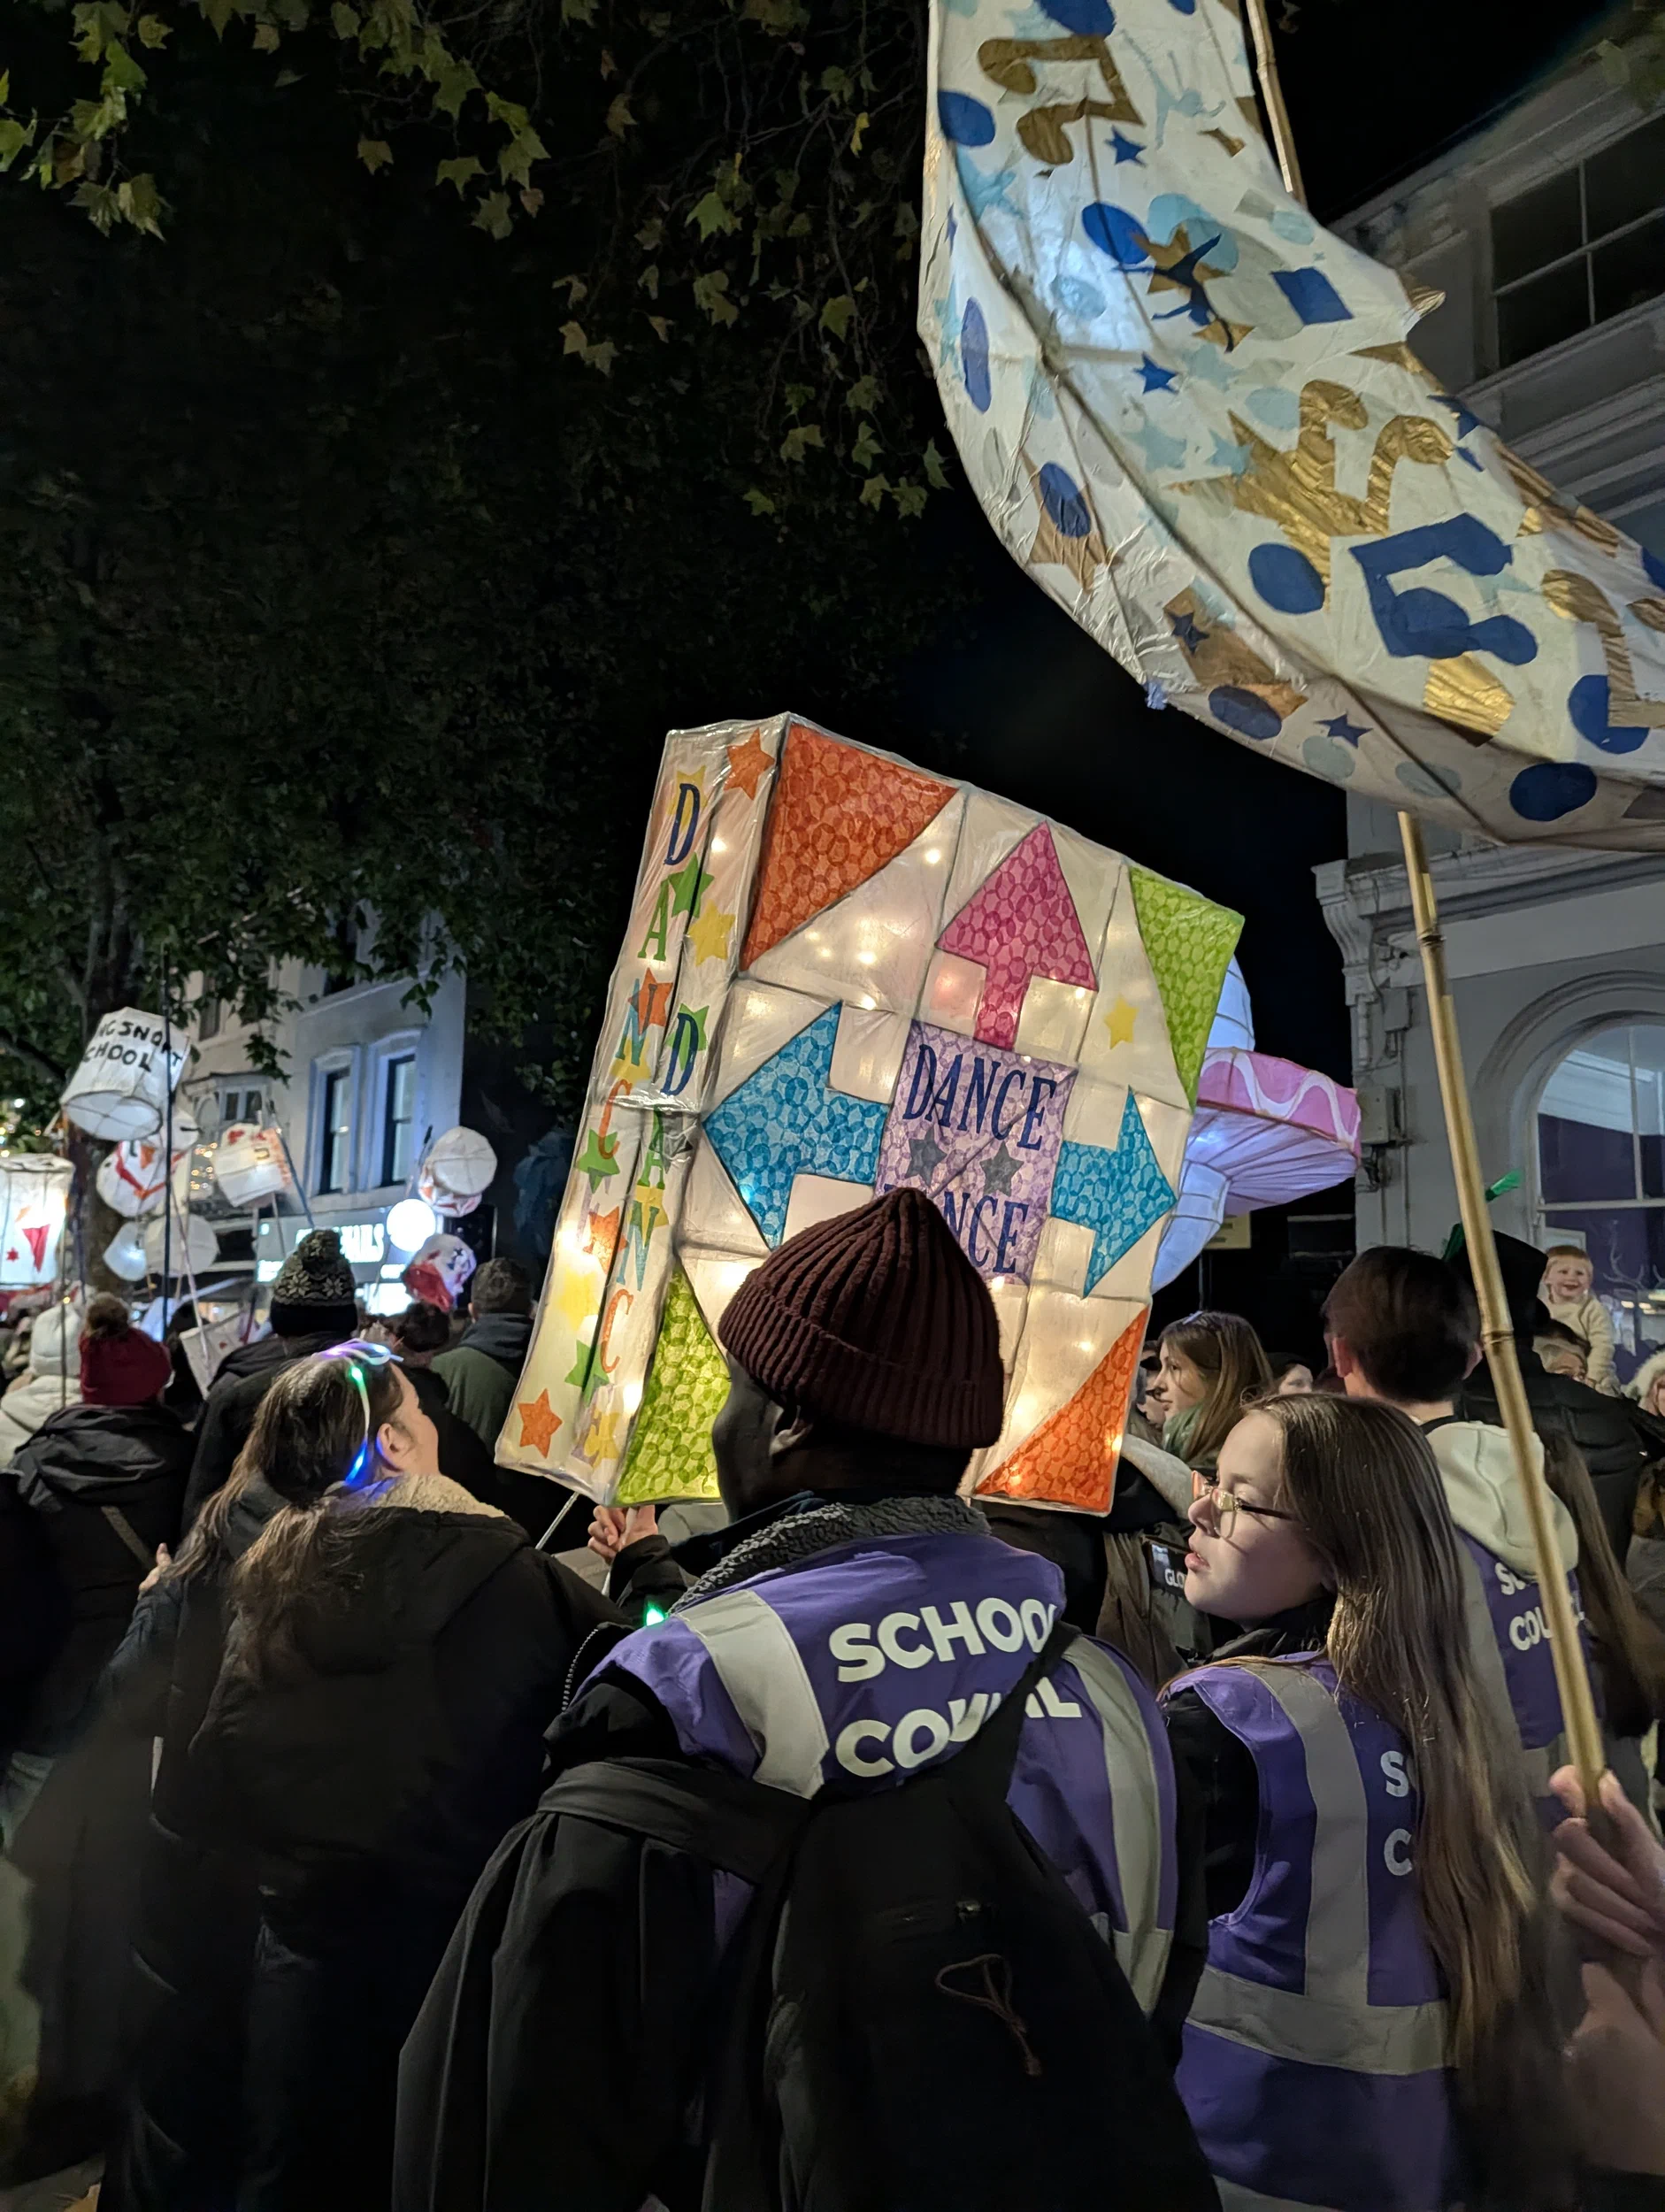
From Behind
- Sat 21 Nov 2026, 17:19
- Google Pixel 10 Pro
- Main camera
- 7mm · f/1.7 · 1/100s · ISO 980
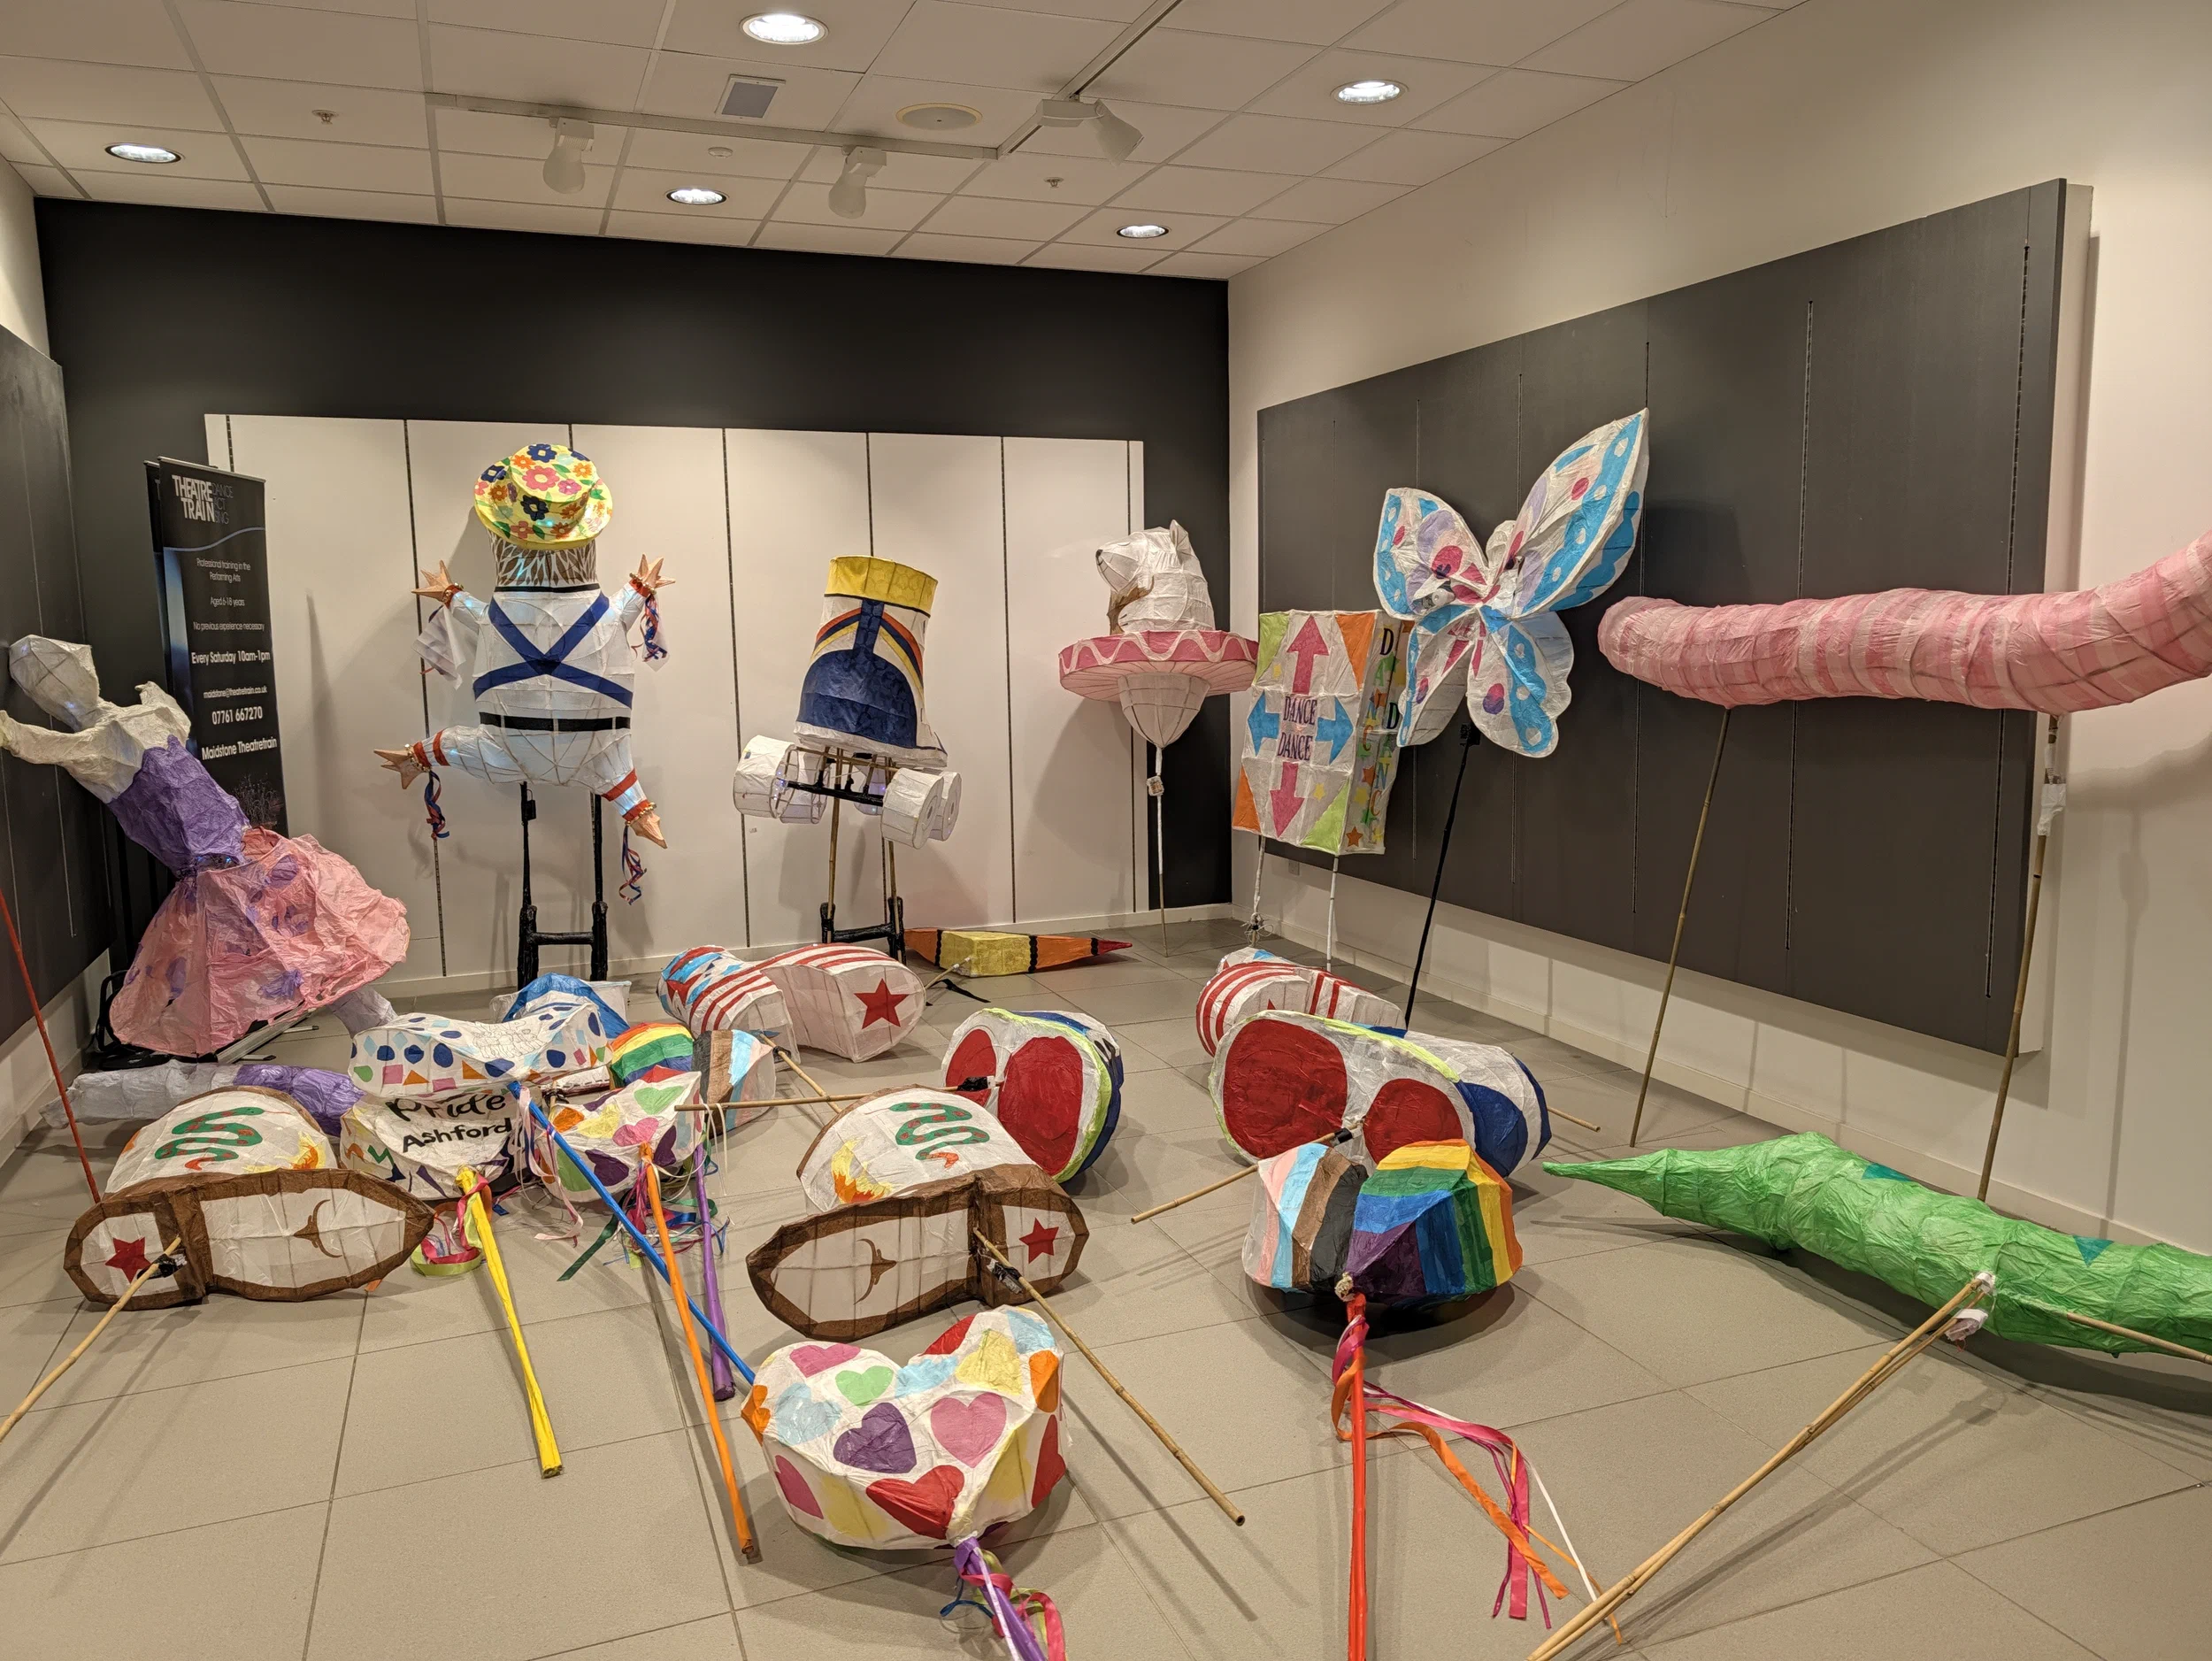
After the Parade
- Sat 21 Nov 2026, 17:54
- Google Pixel 11 Pro
- Pixel 11 Pro back camera 6.9mm f/1.68
- 7mm · f/1.7 · 1/100s · ISO 87
Final Thoughts
The event went great, it was so nice seeing so many people in Ashford out together and happy. Walking the parade was a very different experience to watching it, it was great seeing so many people realising what the lantern was, but it did mean we didn’t get to see many of the other lanterns properly like we would if we were just watching.
I won’t be using reed switches again, they were far too much of a pain. I’ll have to think of a different gimmick for next time.
-
Every year they hire in a float to lead the procession, maybe one year we can raise enough money to build our own… ↩︎
-
Not sure we want to keep this at home… it’s a bit big. ↩︎
-
There is some gaffa, and cable ties hiding in there too. ↩︎
-
Not the most useful feature I must admit for our shape. ↩︎
-
Square shapes it turns out are not easy. ↩︎
-
So making it less actually square, and not stick out. ↩︎
-
Spirals are a pain in FreeCAD, and need at least three different workbenches. ↩︎
-
The bed size of the A1 Mini is really starting to be an issue. ↩︎
-
The two reeds inside are made of a magnetic metal, so a field along the switch turns them into a pair of opposite poles that snap together. A field across the switch, which is what you mostly get from a disc held flat against it, just doesn’t do much. ↩︎